Are you rapidly approaching the expiration date for your Apple Push Notification service (APNs) certificate? Fret not! Renewing an APNs certificate is a very easy process, so let's dive right in!
The first step to renewing your APNs certificate is obtaining a Certificate Signing Request (CSR). If you are on a Mac, you can use Keychain to request a new CSR. For Windows users, you can generate a CSR using the certificate snap-in in MMC. Linux users can use the openssl tool. For this tutorial, we'll go over creating a CSR using Keychain Access on macOS. I will go over CSRs for other platforms in a separate tutorial.
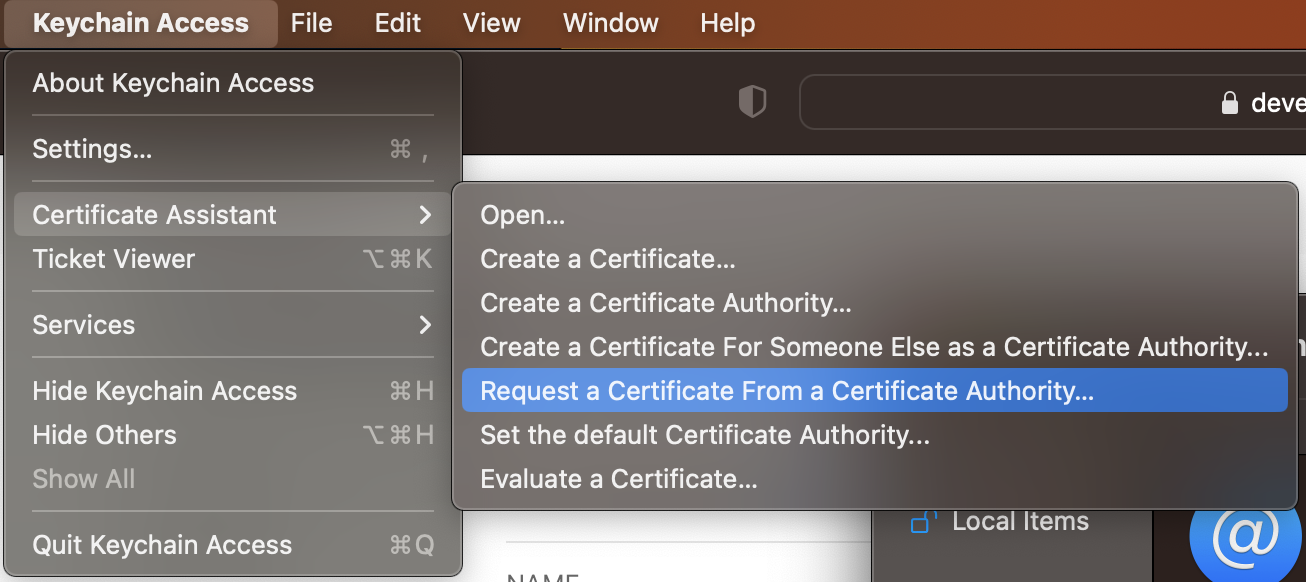
Fire up Keychain Access and navigate to the "Request a Certificate from a Certificate Authority..." menu item (illustrated in the screenshot below).
A window will open up asking for some information to complete the CSR. The first item is your email address. This can be your business email address, the email address you use with your Apple Developer account, or your personal email address. Just make sure you can receive emails at whatever address you supply just in case.
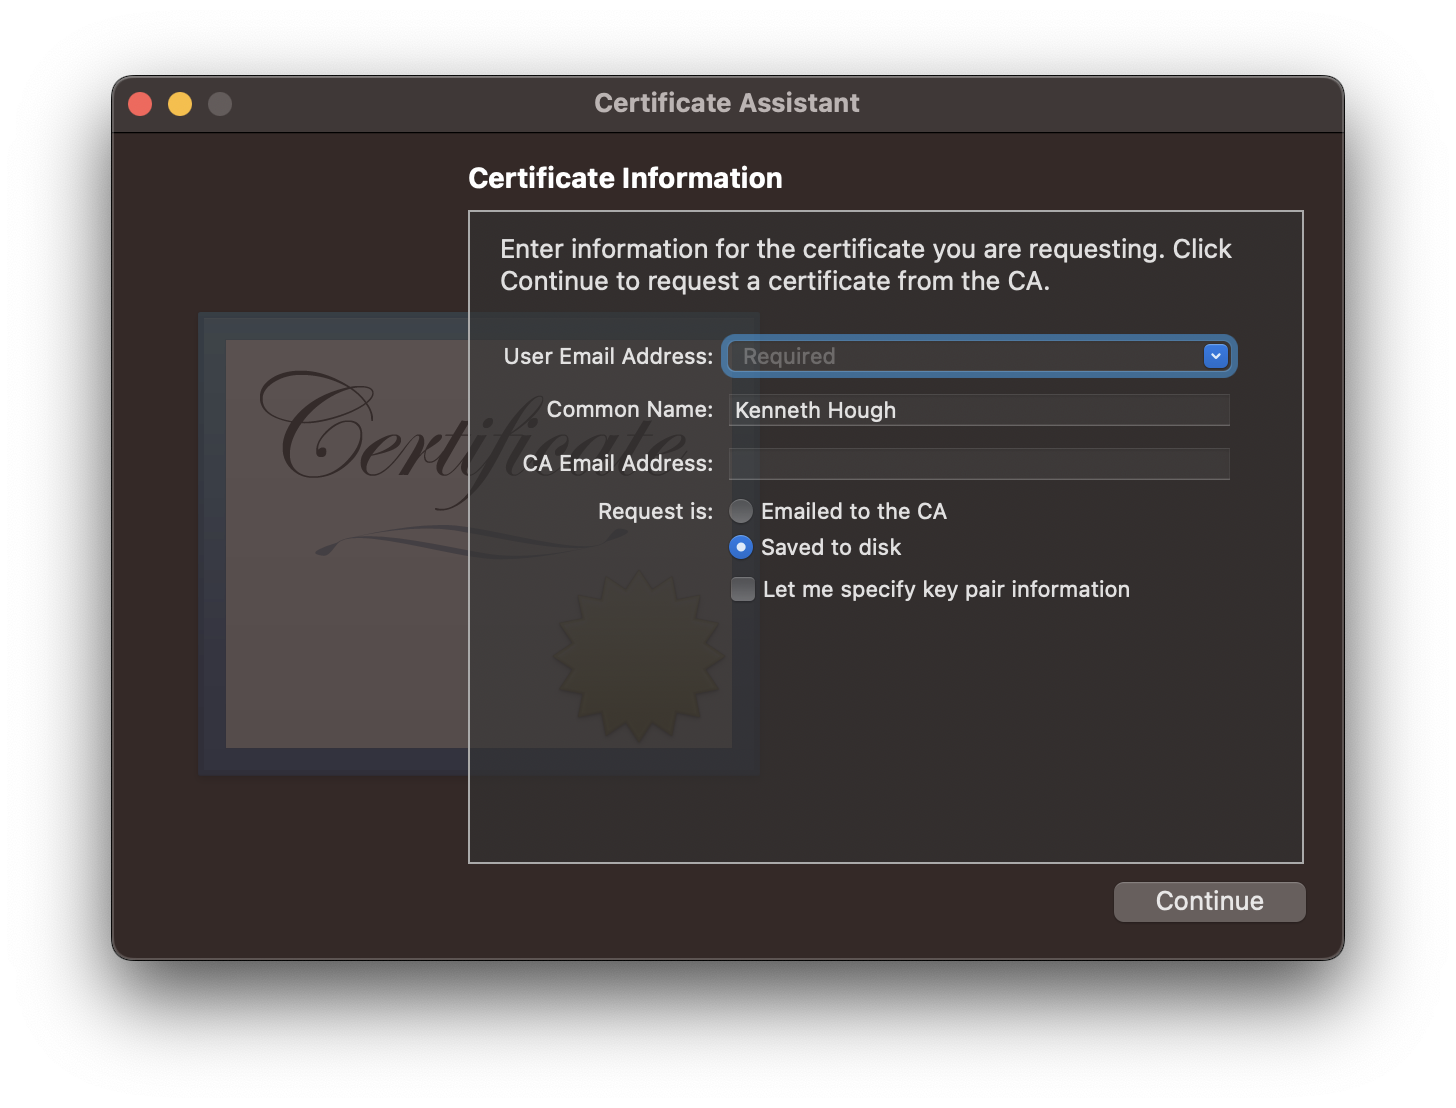
Next, you specify a common name for the certificate. By default, you'll see your name pre-populated in the common name field. I recommend a name specific to the purpose of your APNs. For example, if you are setting up Push Notification for your app called "FooBar", then maybe something along the lines of "FooBar APNs". If you are creating a certificate specific for a sandbox, I suggest adding the word "Sandbox" to the end too. The common name will also be the same name used for the private key which you will need to find in Keychain Access for exporting the certificate in p12 format (required for AWS SNS). Providing a specific name will make it easier to find the private key, as well as keeping track of the purpose of the certificate.
Before you are ready to continue to the next step, make sure you have "Save to disk" selected for "Request is:". Click "continue" and save your CSR, which we will use later to upload to Apple.
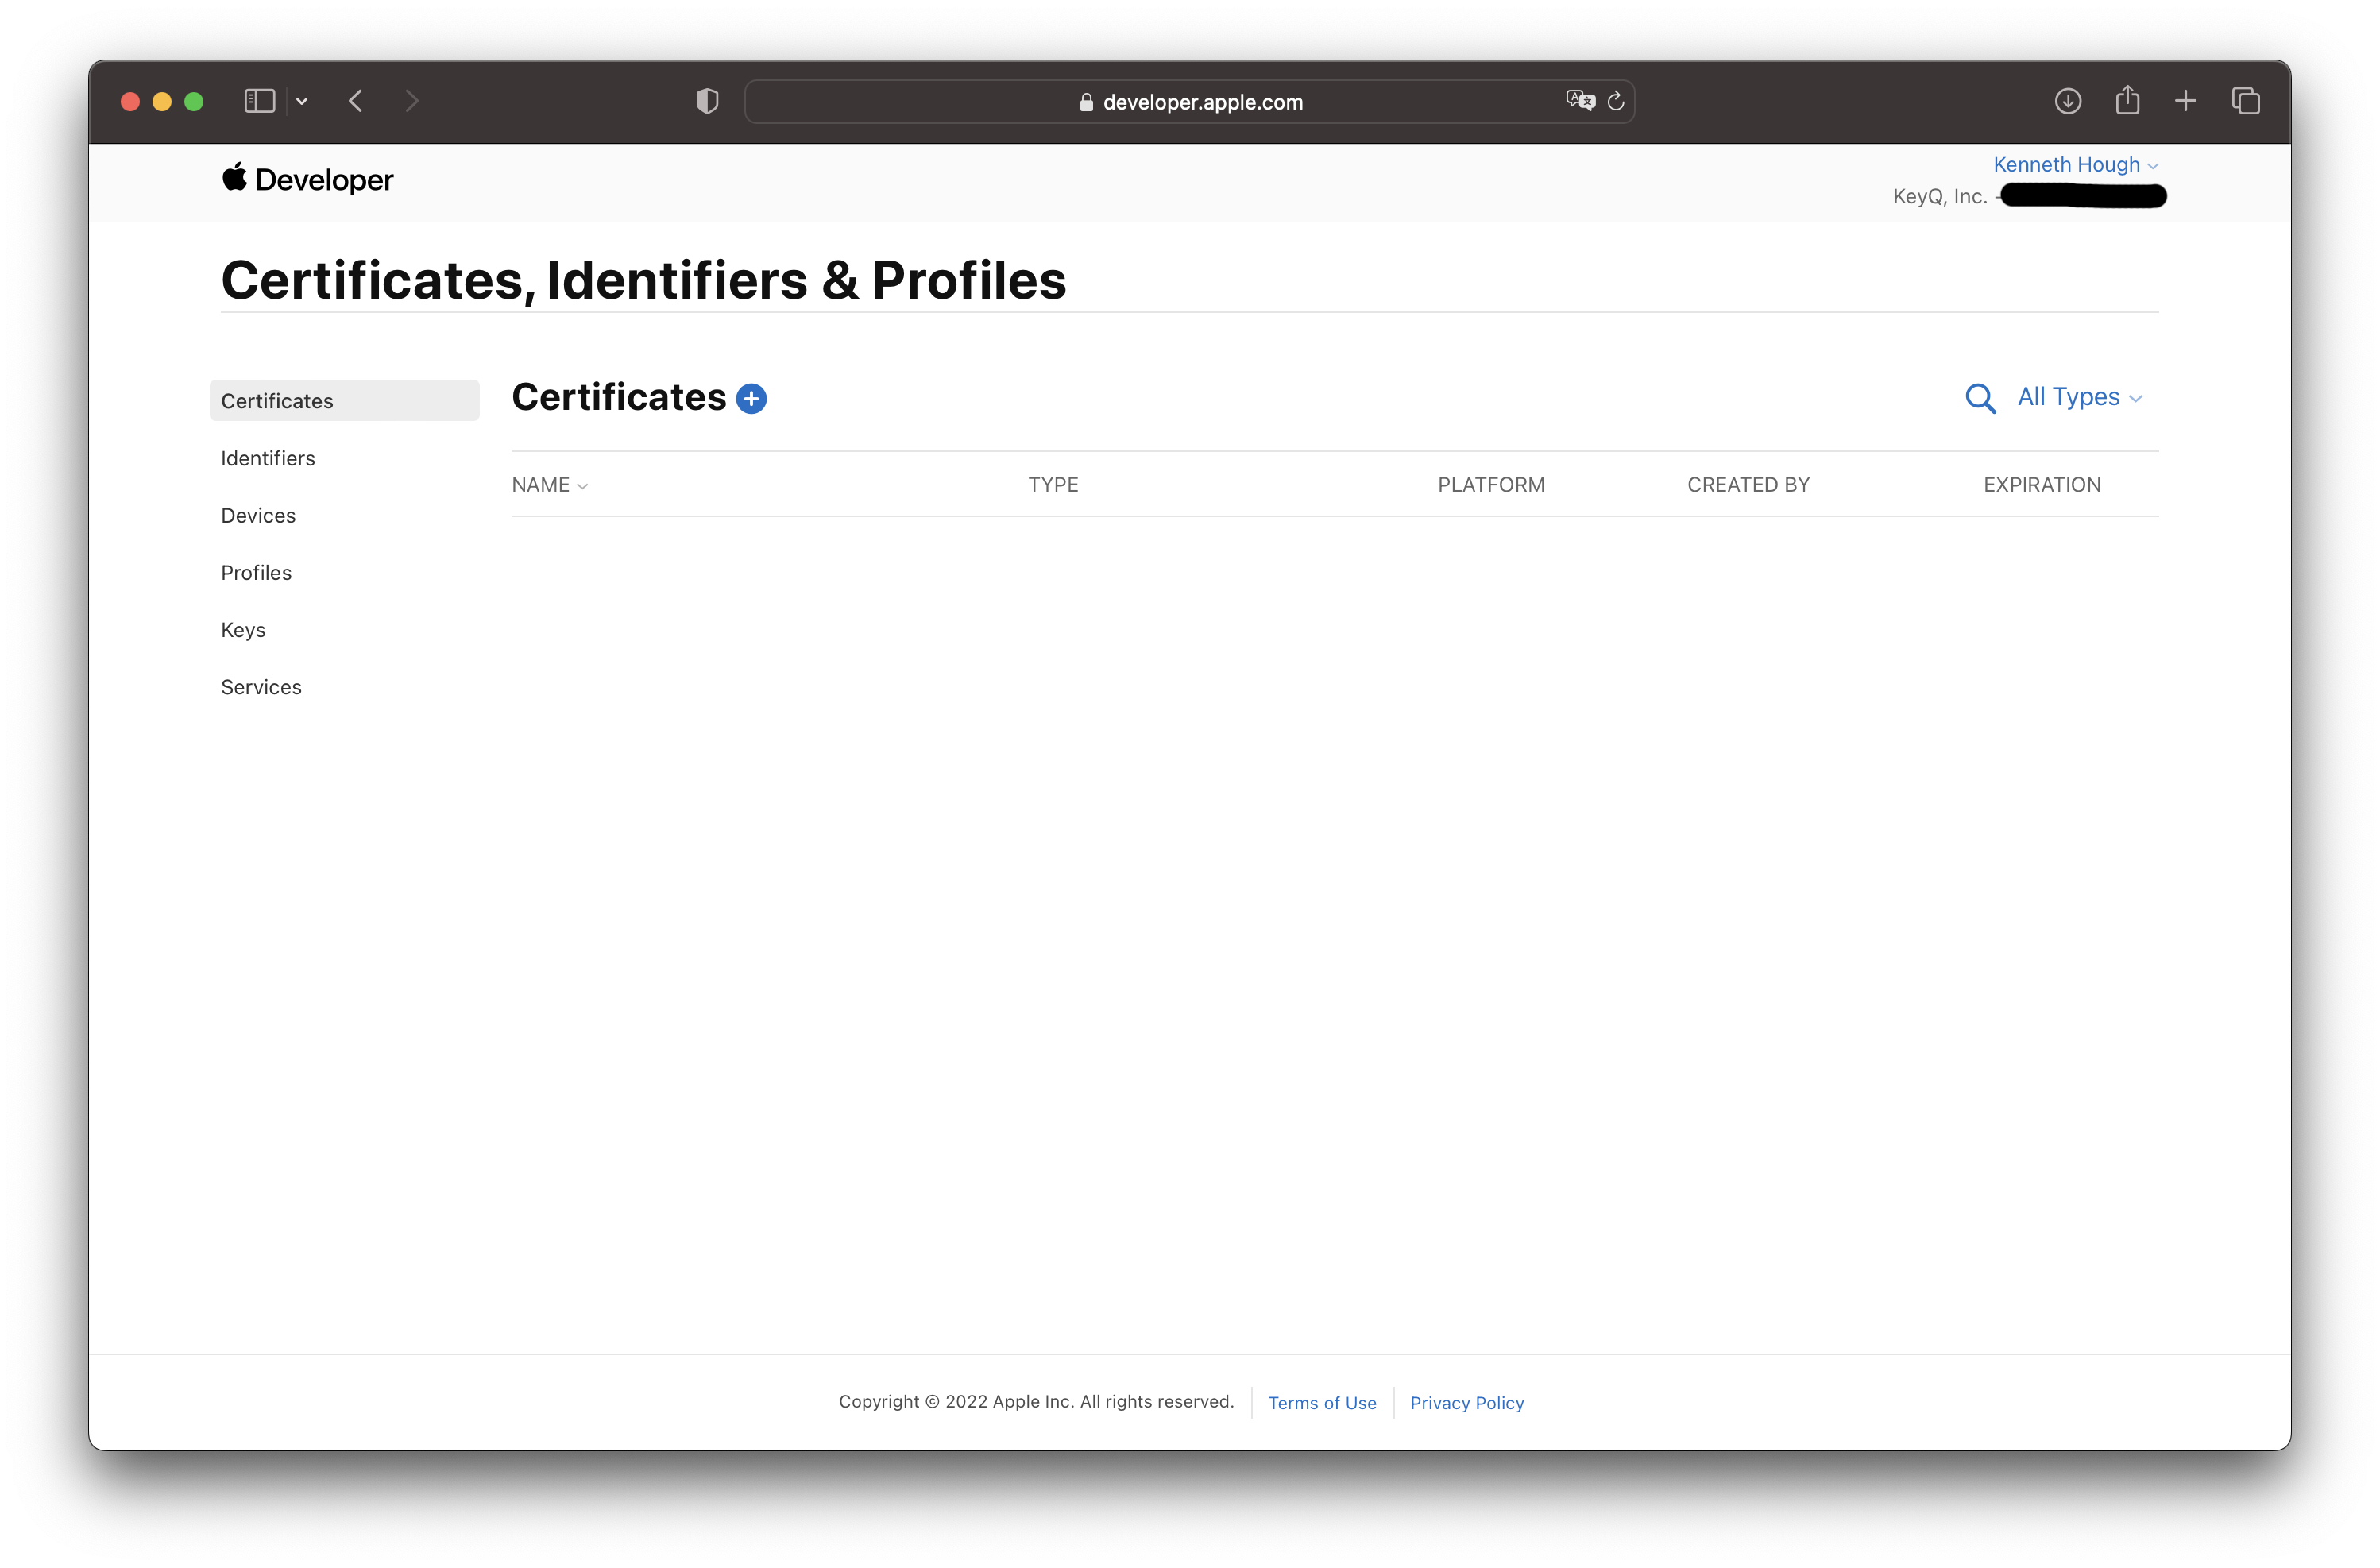
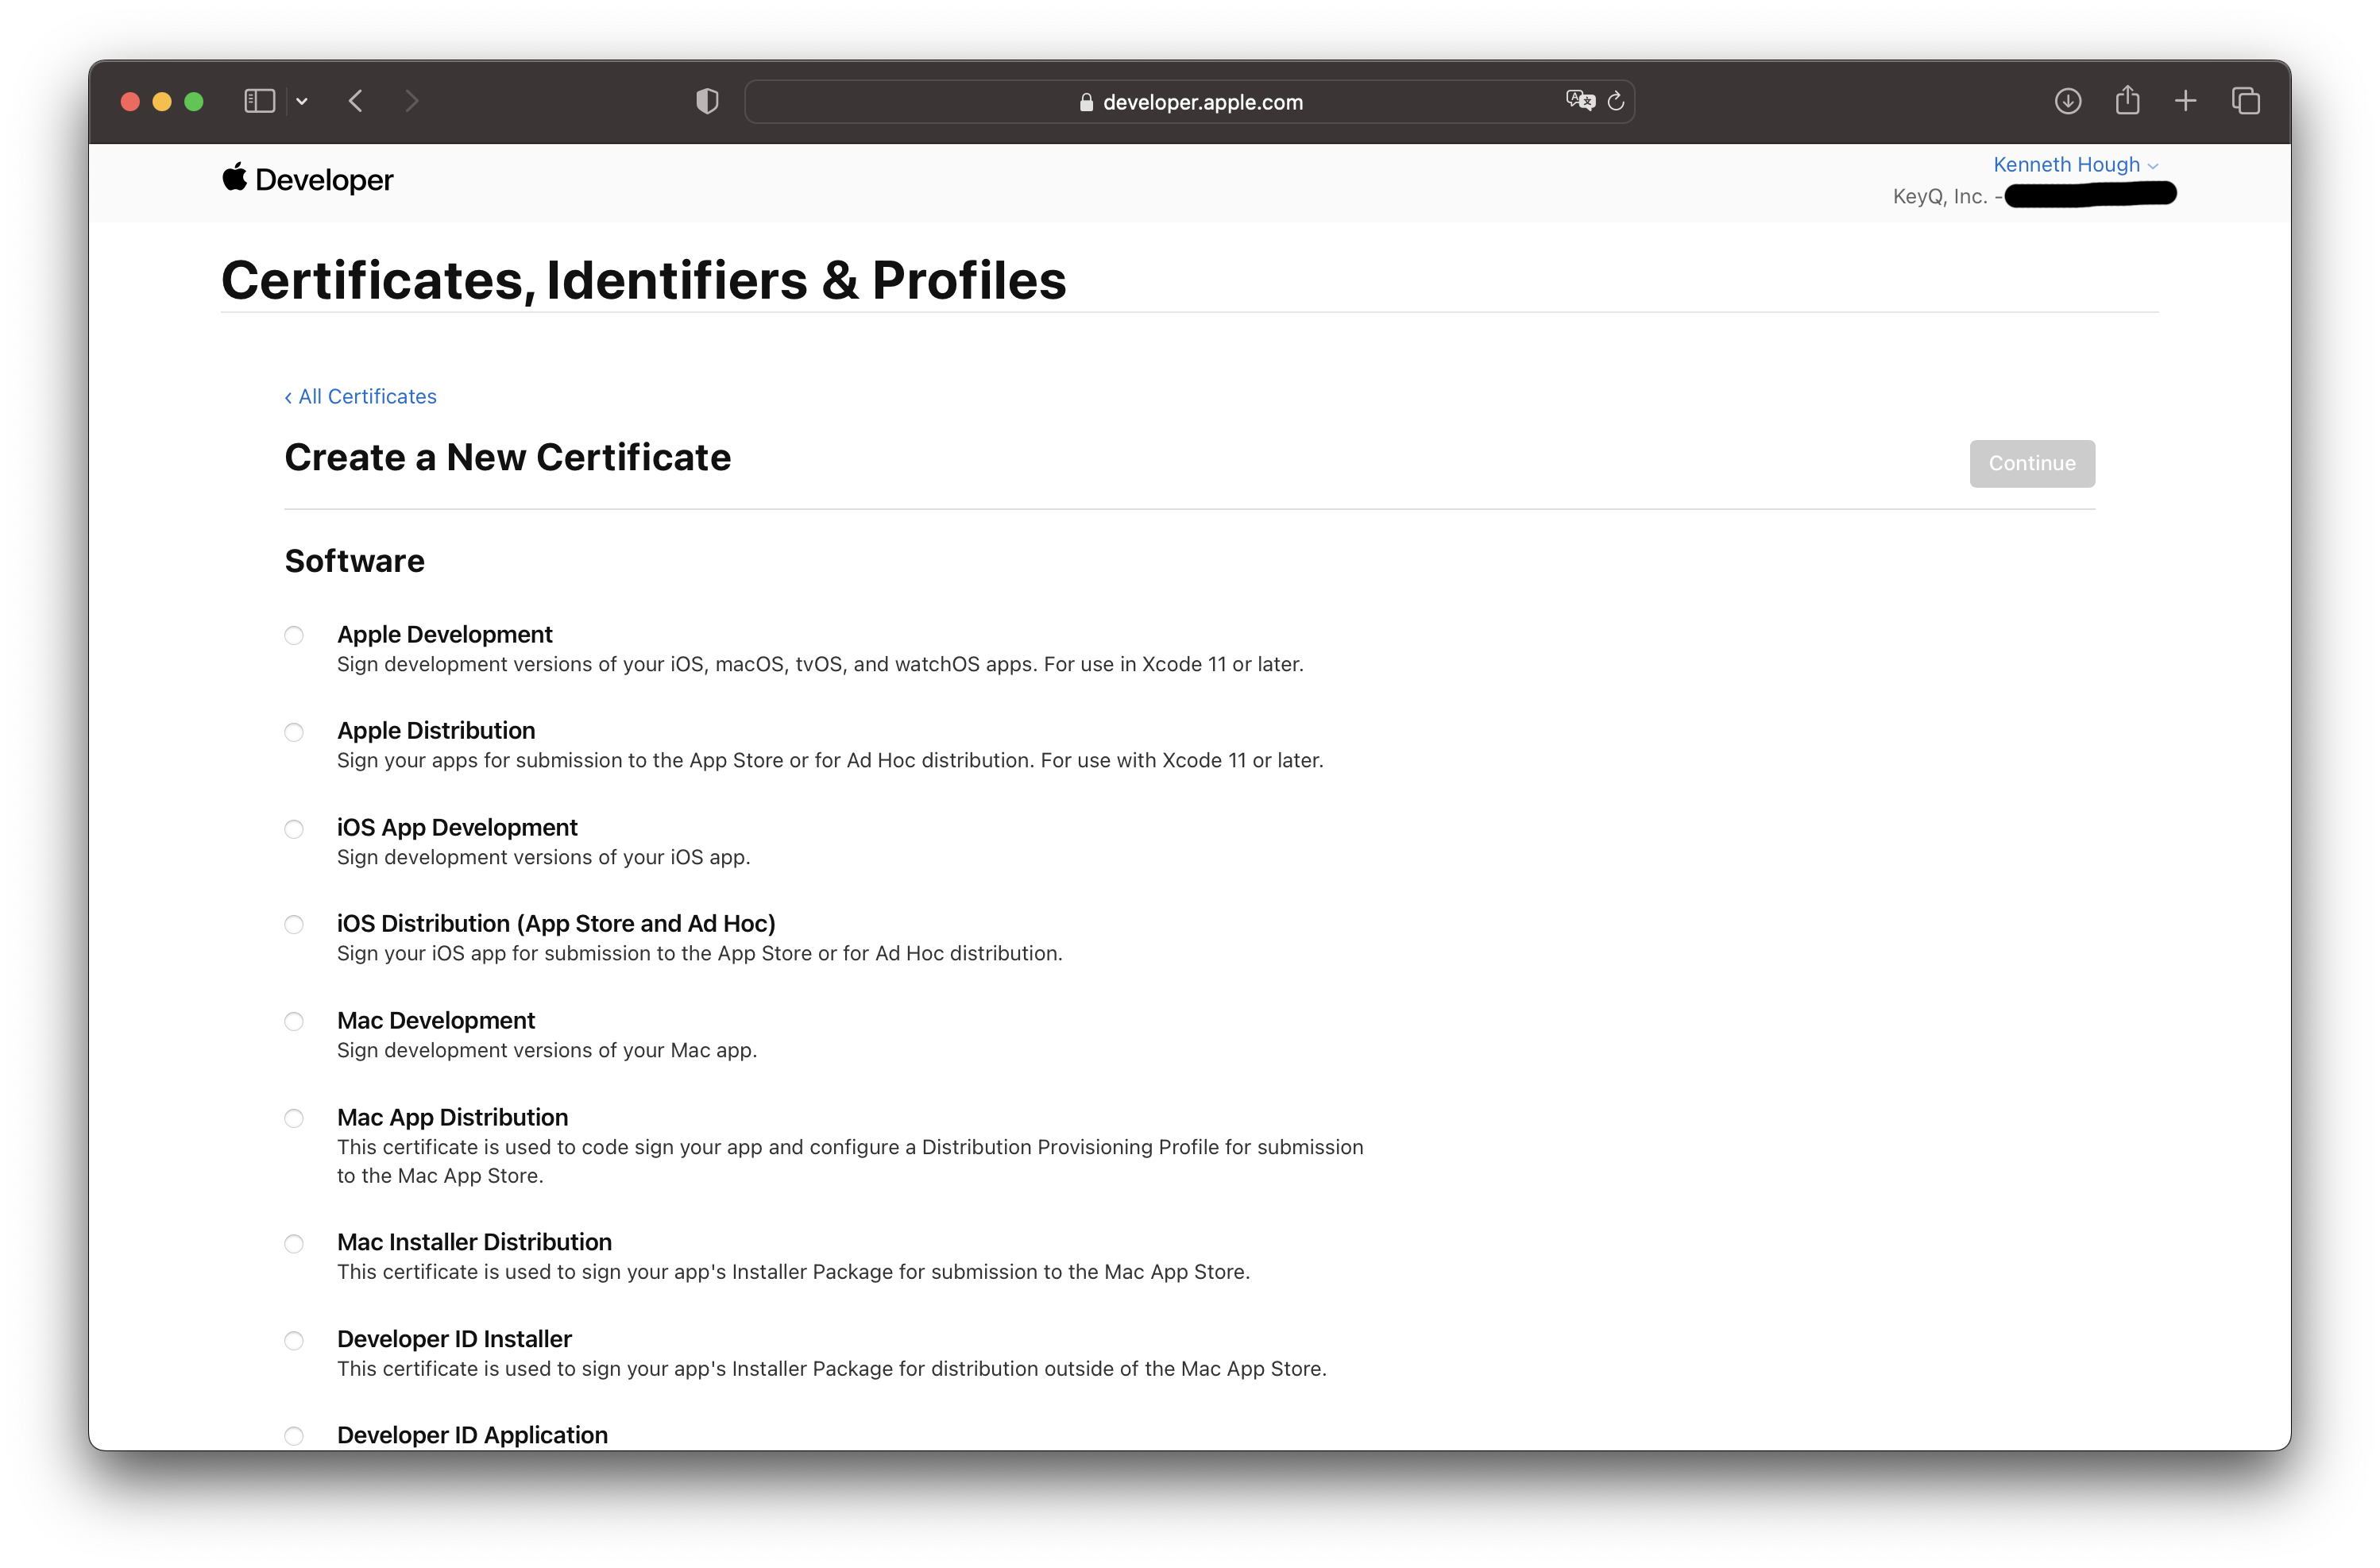
Once your CSR has been created, you are ready to request a new APNs certificate from Apple. Login to your Apple Developer Account and navigate to Certificate. From the certificate page, click on the blue plus sign to create a new certificate.
You'll then be asked what type of certificate you would like to create.
Scroll down until you see the Services section and the options for Apple Push Notification service SSL.
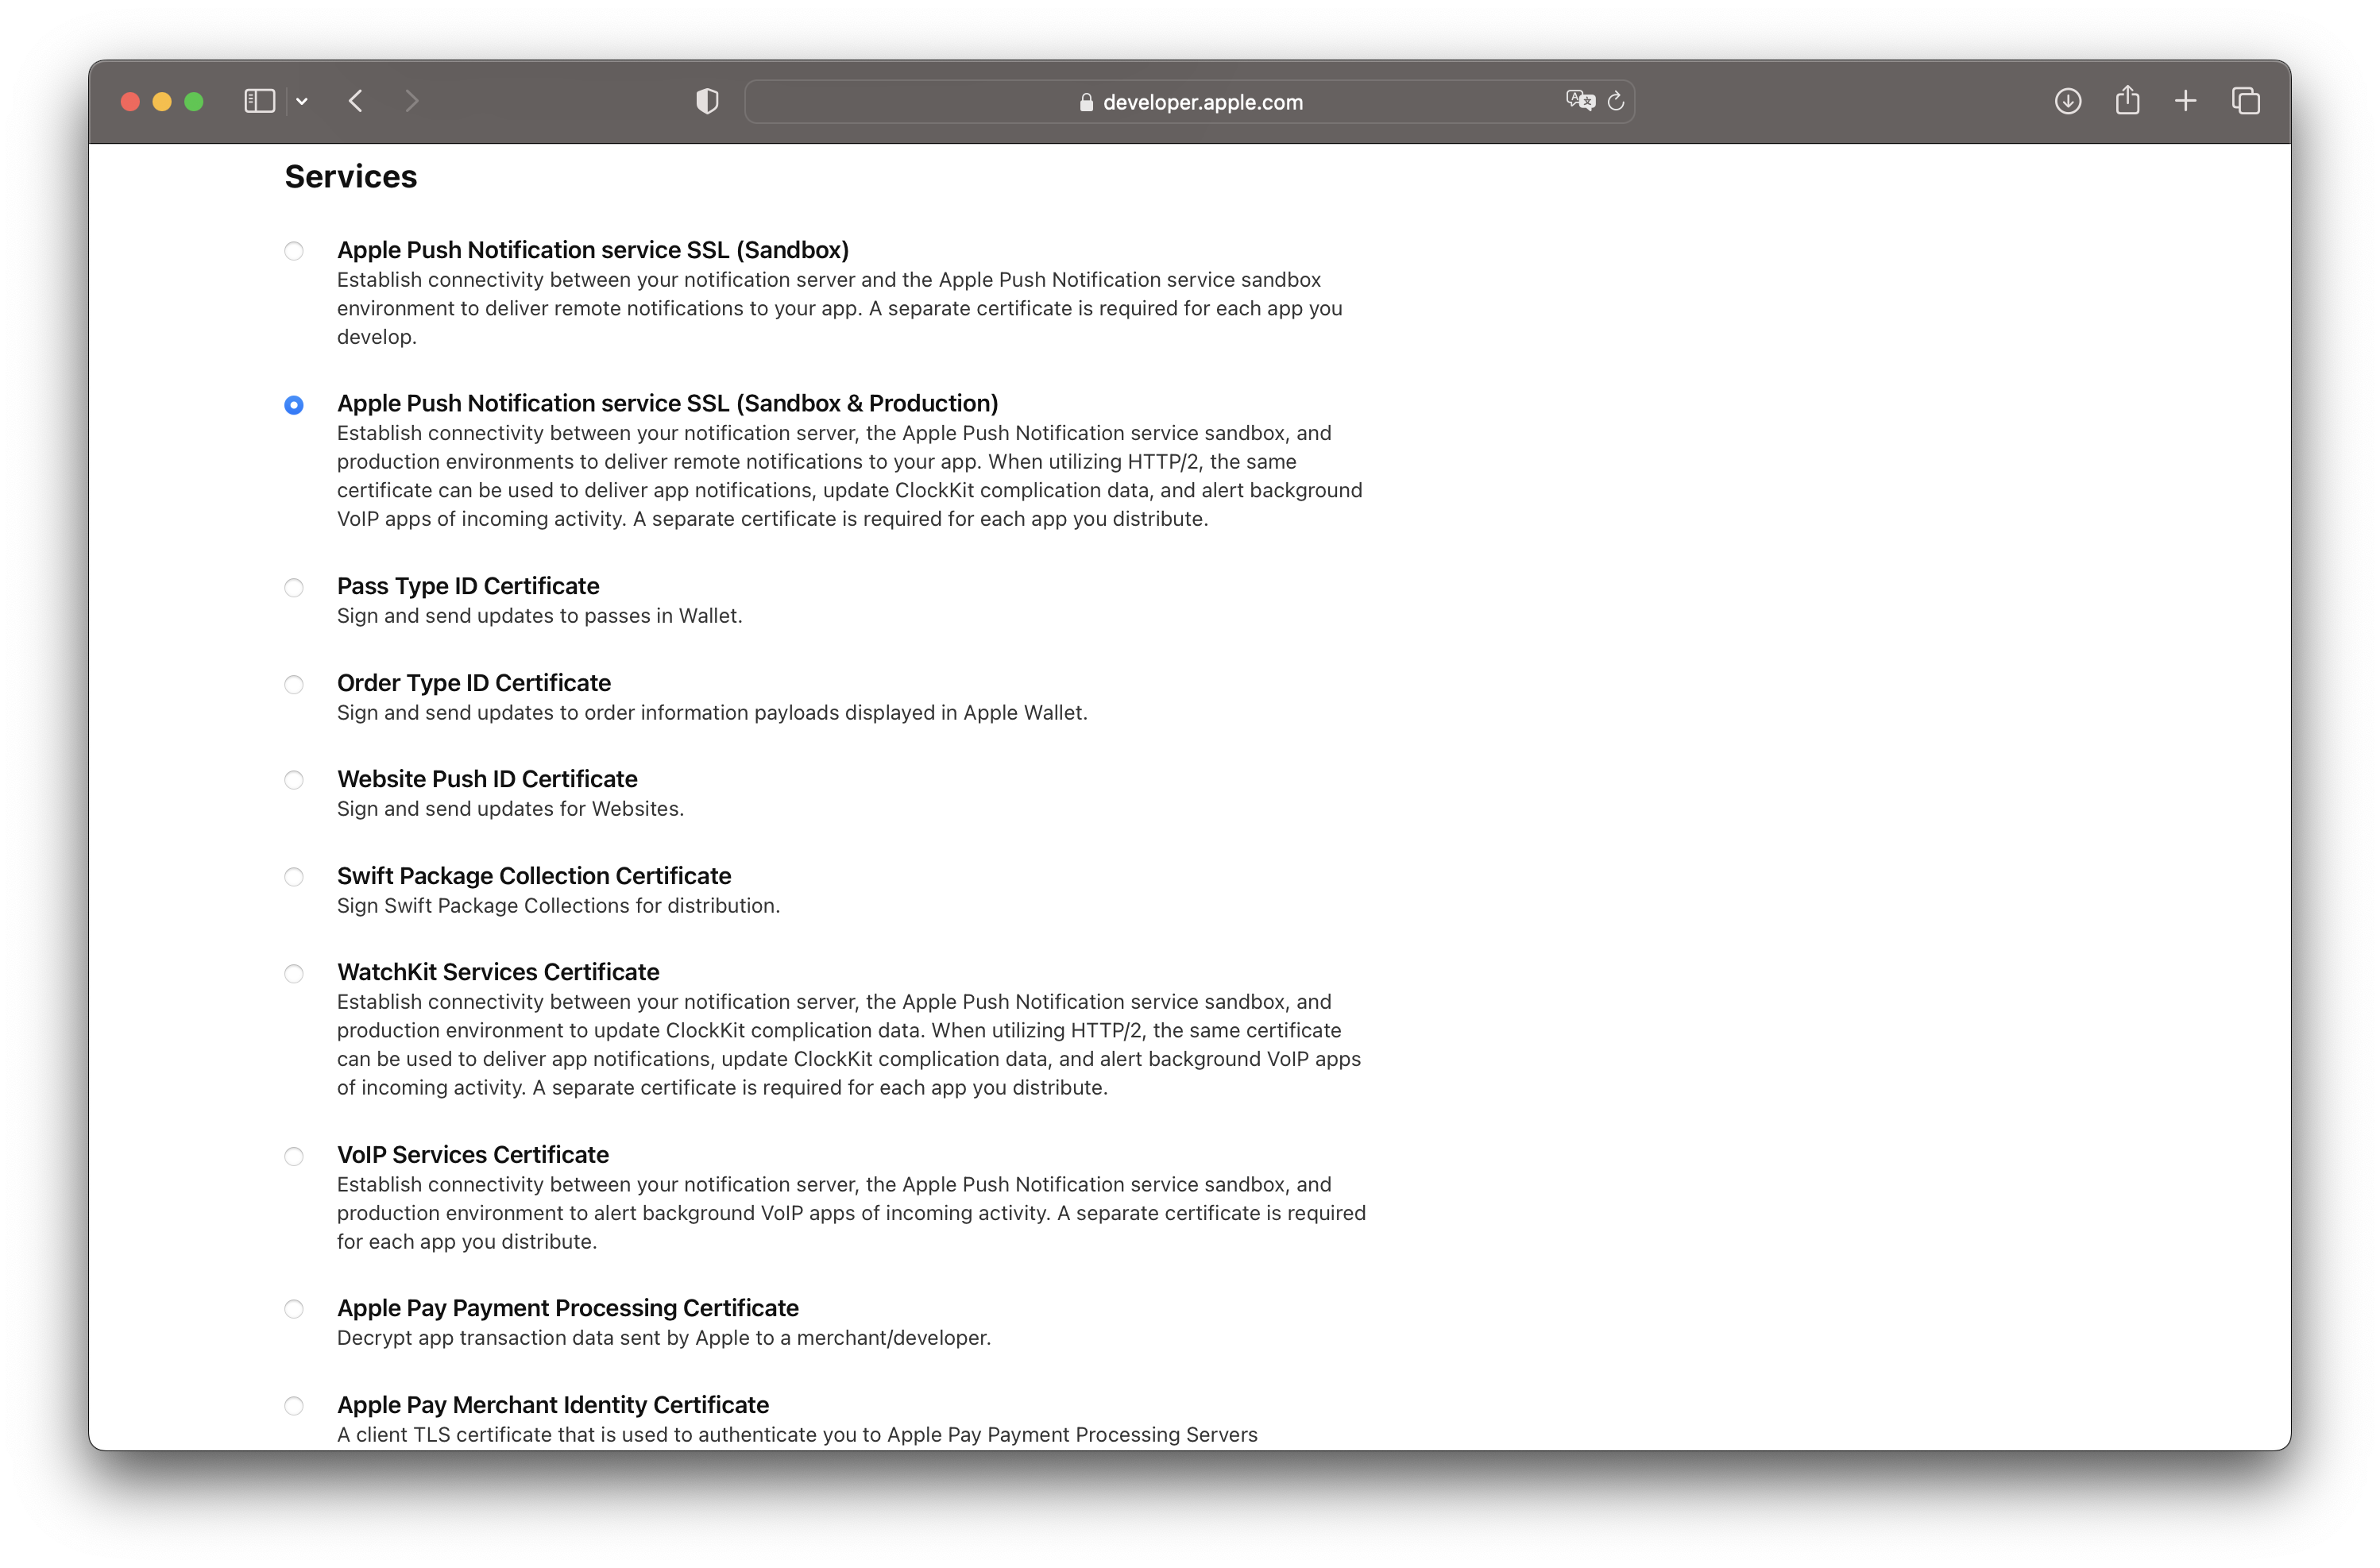
If you are creating a sandbox only platform (i.e. testing Push Notification from Xcode builds), then select the Sandbox option. If you are planning to release builds for beta testing on TestFlight as well as publishing the app, select Sandbox & Production. Keep in mind that Push Notifications on TestFlight and Published apps require a Production environment. Once you've selected the type of certificate, then scroll back up top and click continue.
You'll next be asked to select an App ID for your APN service.
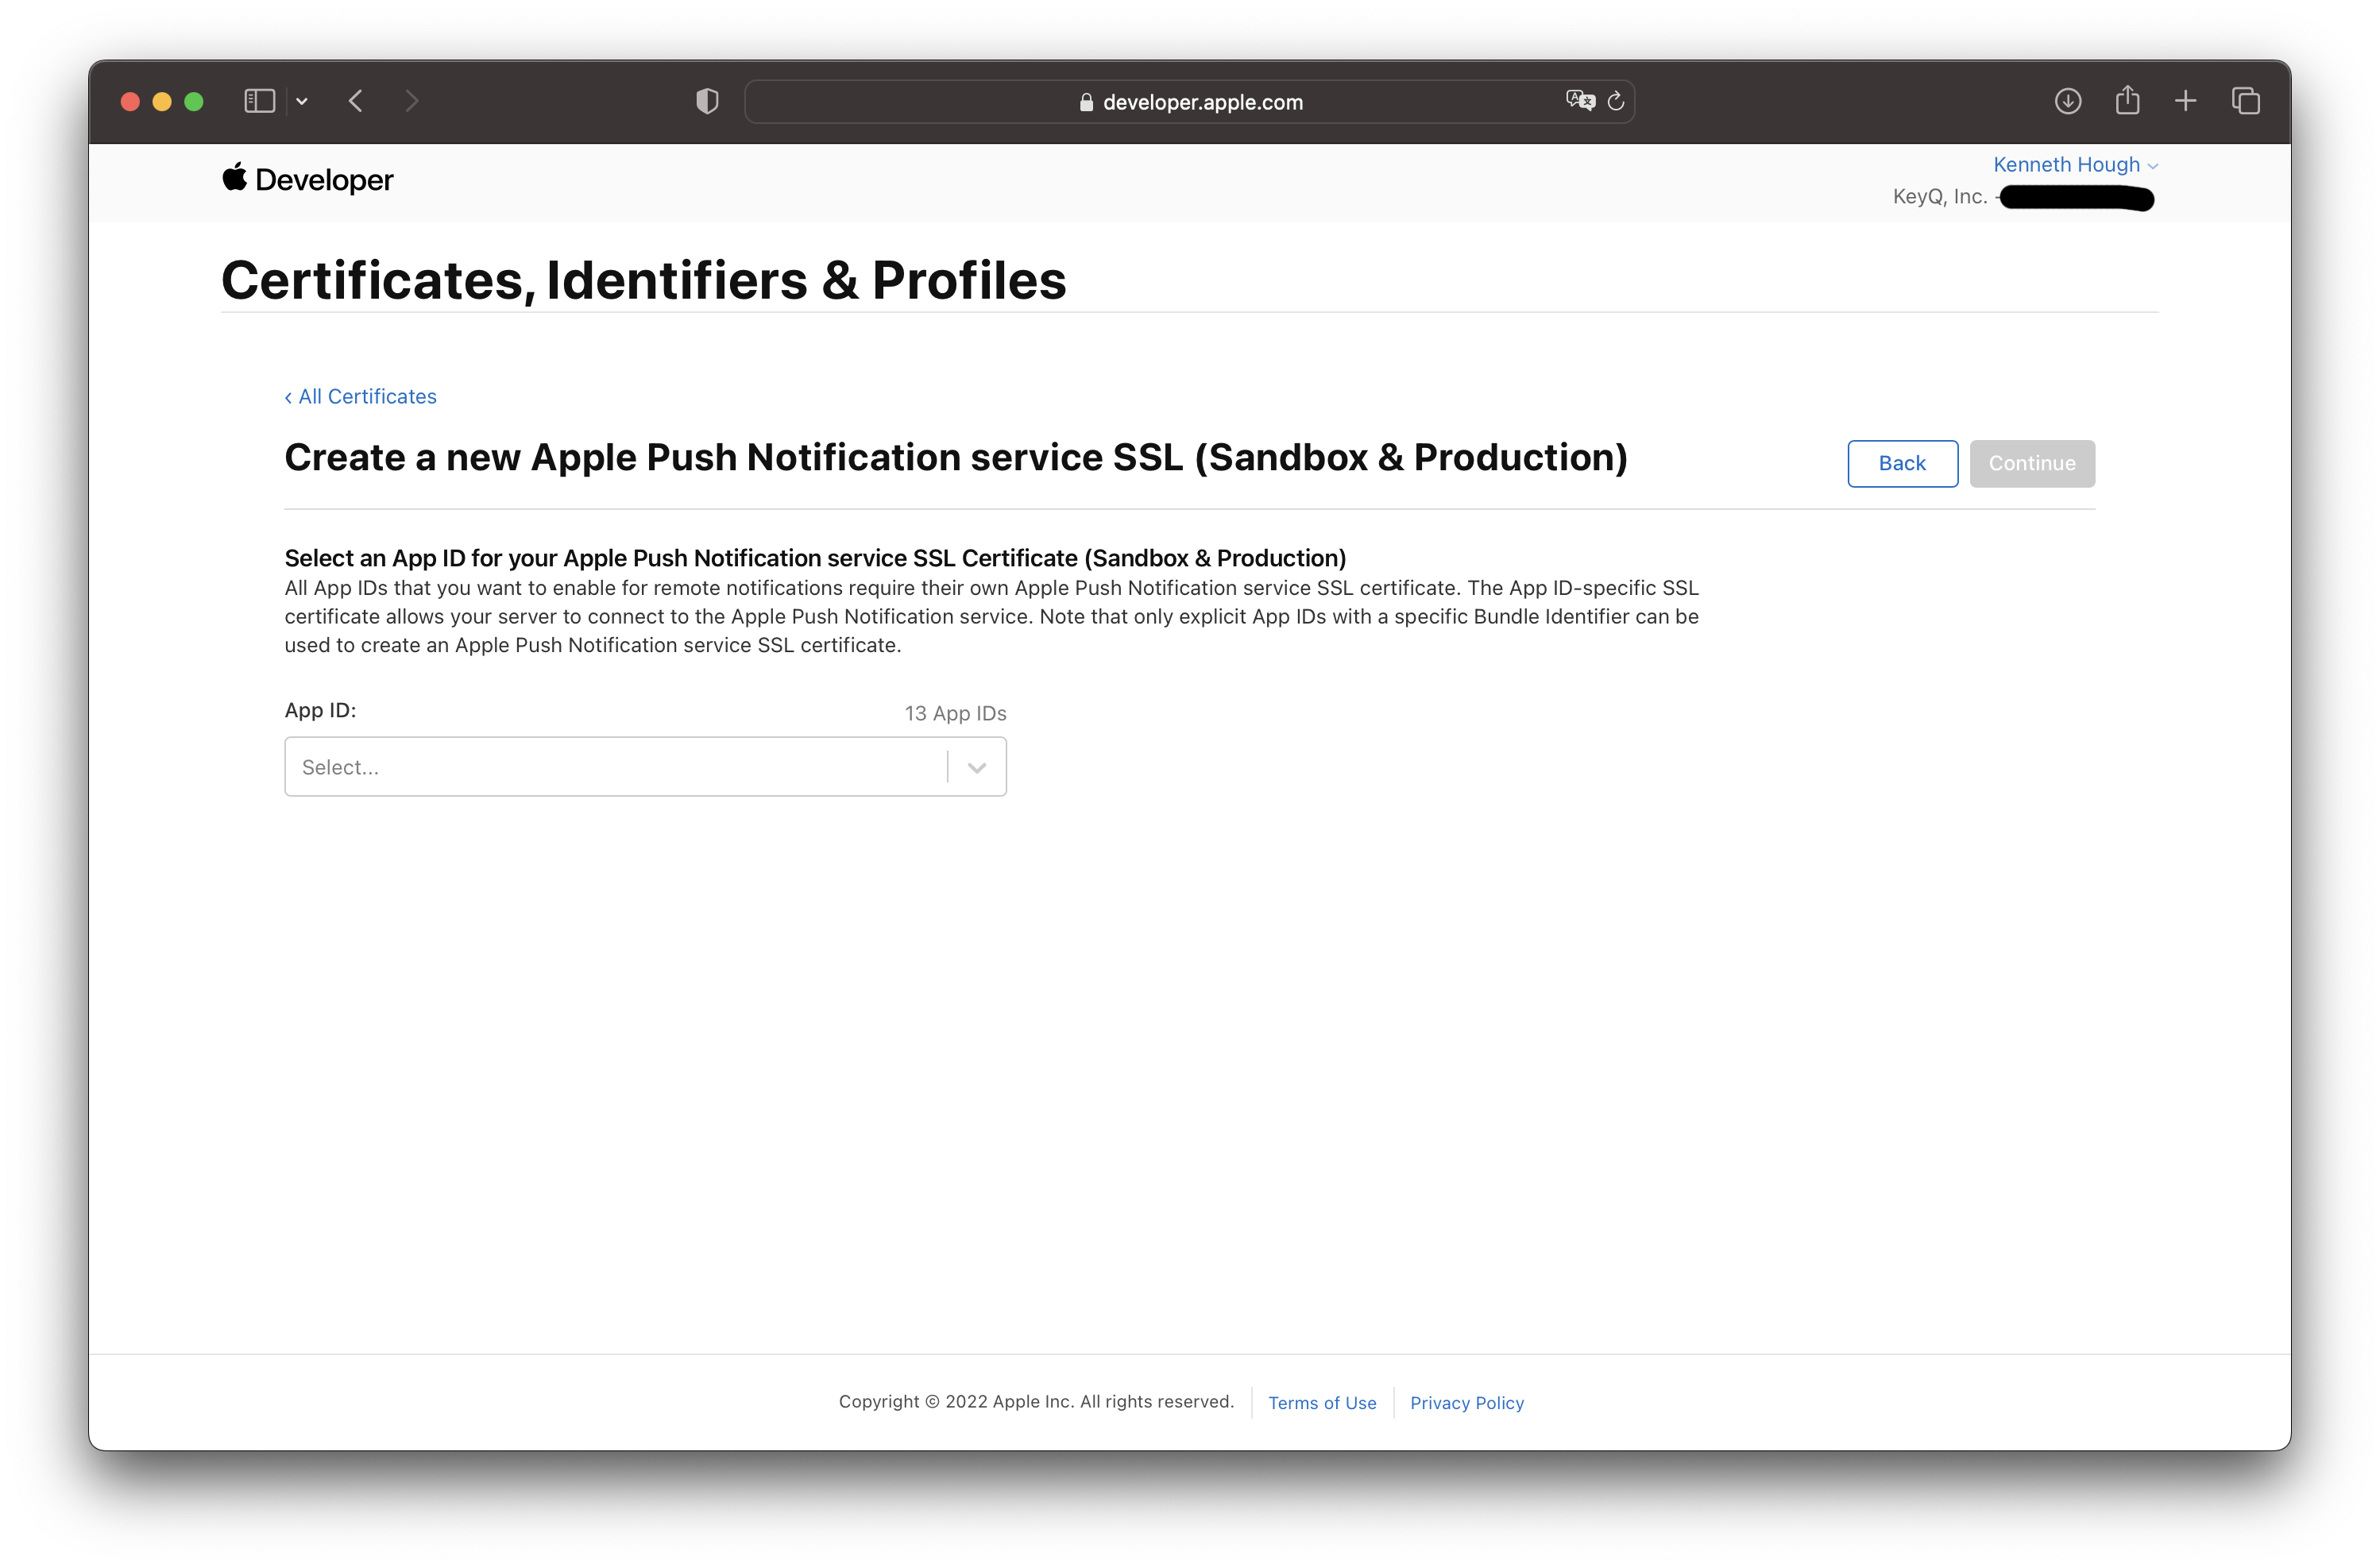
Once you've selected an App ID, click continue to upload your CSR.
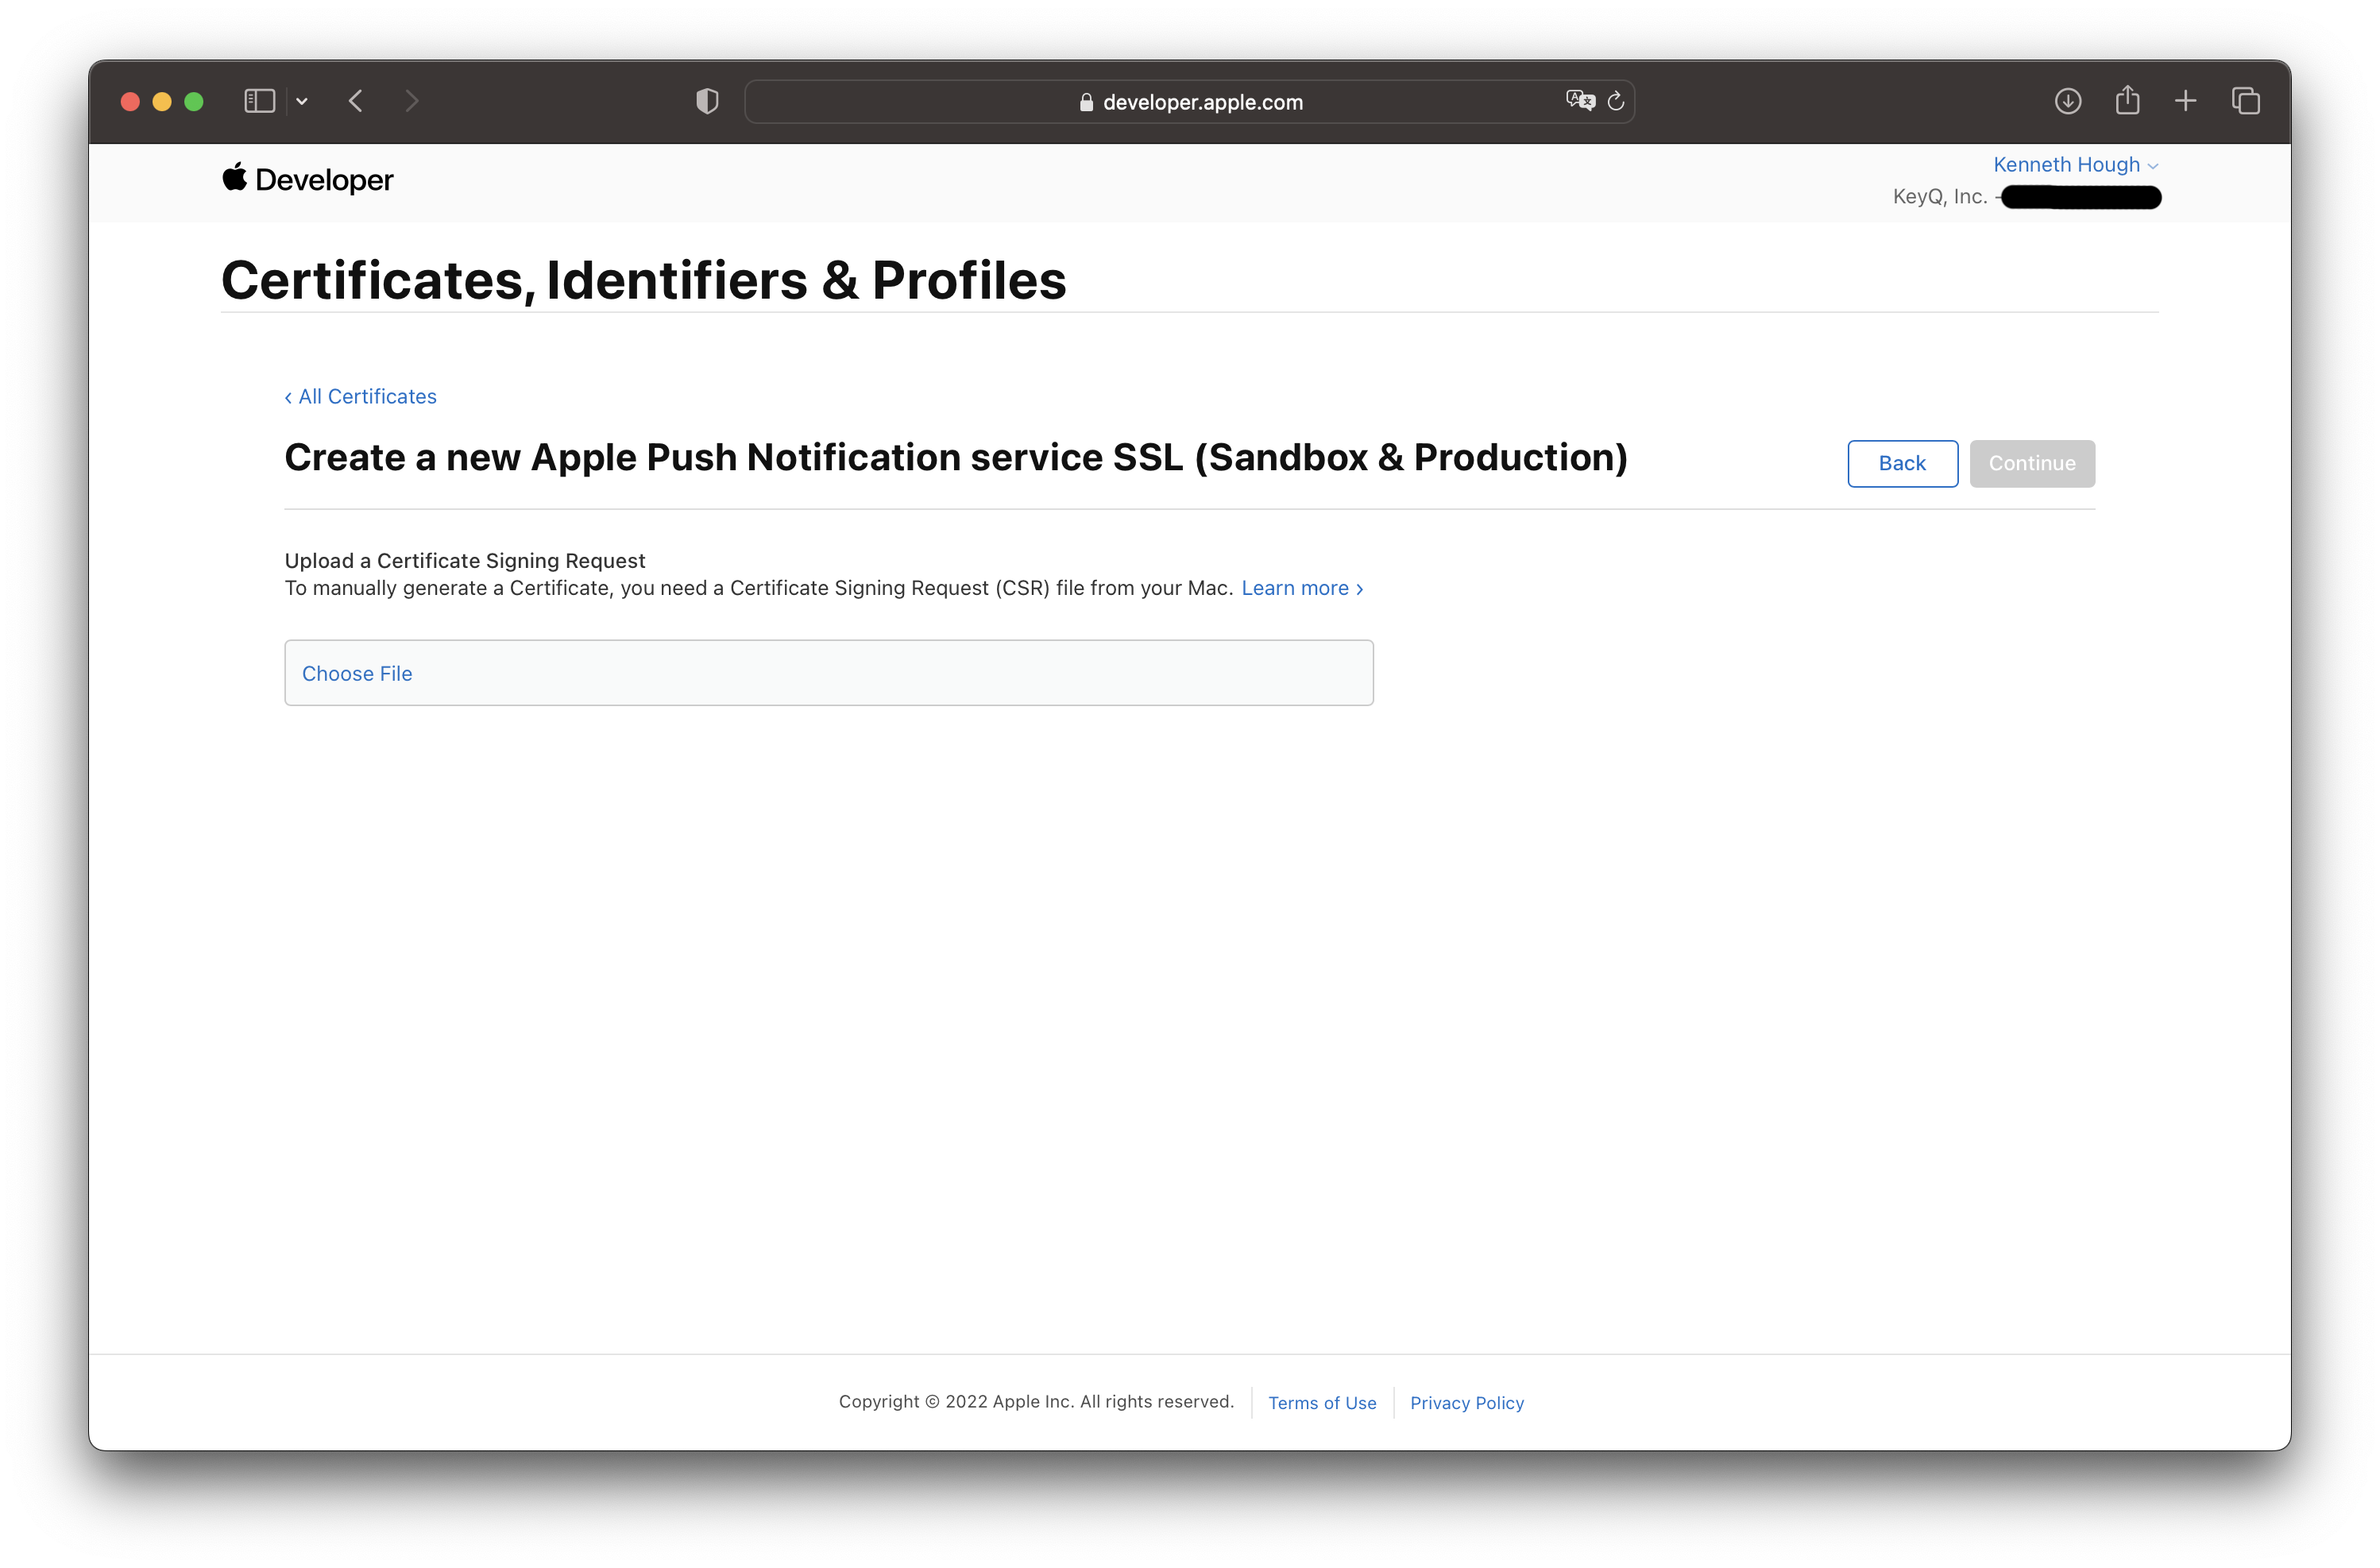
Click "Choose File" and select the CSR you just created in the earlier steps using Keychain Access. Click continue and you should see a new screen with your APNs certificate ready for download (psst...blue button on the top right).
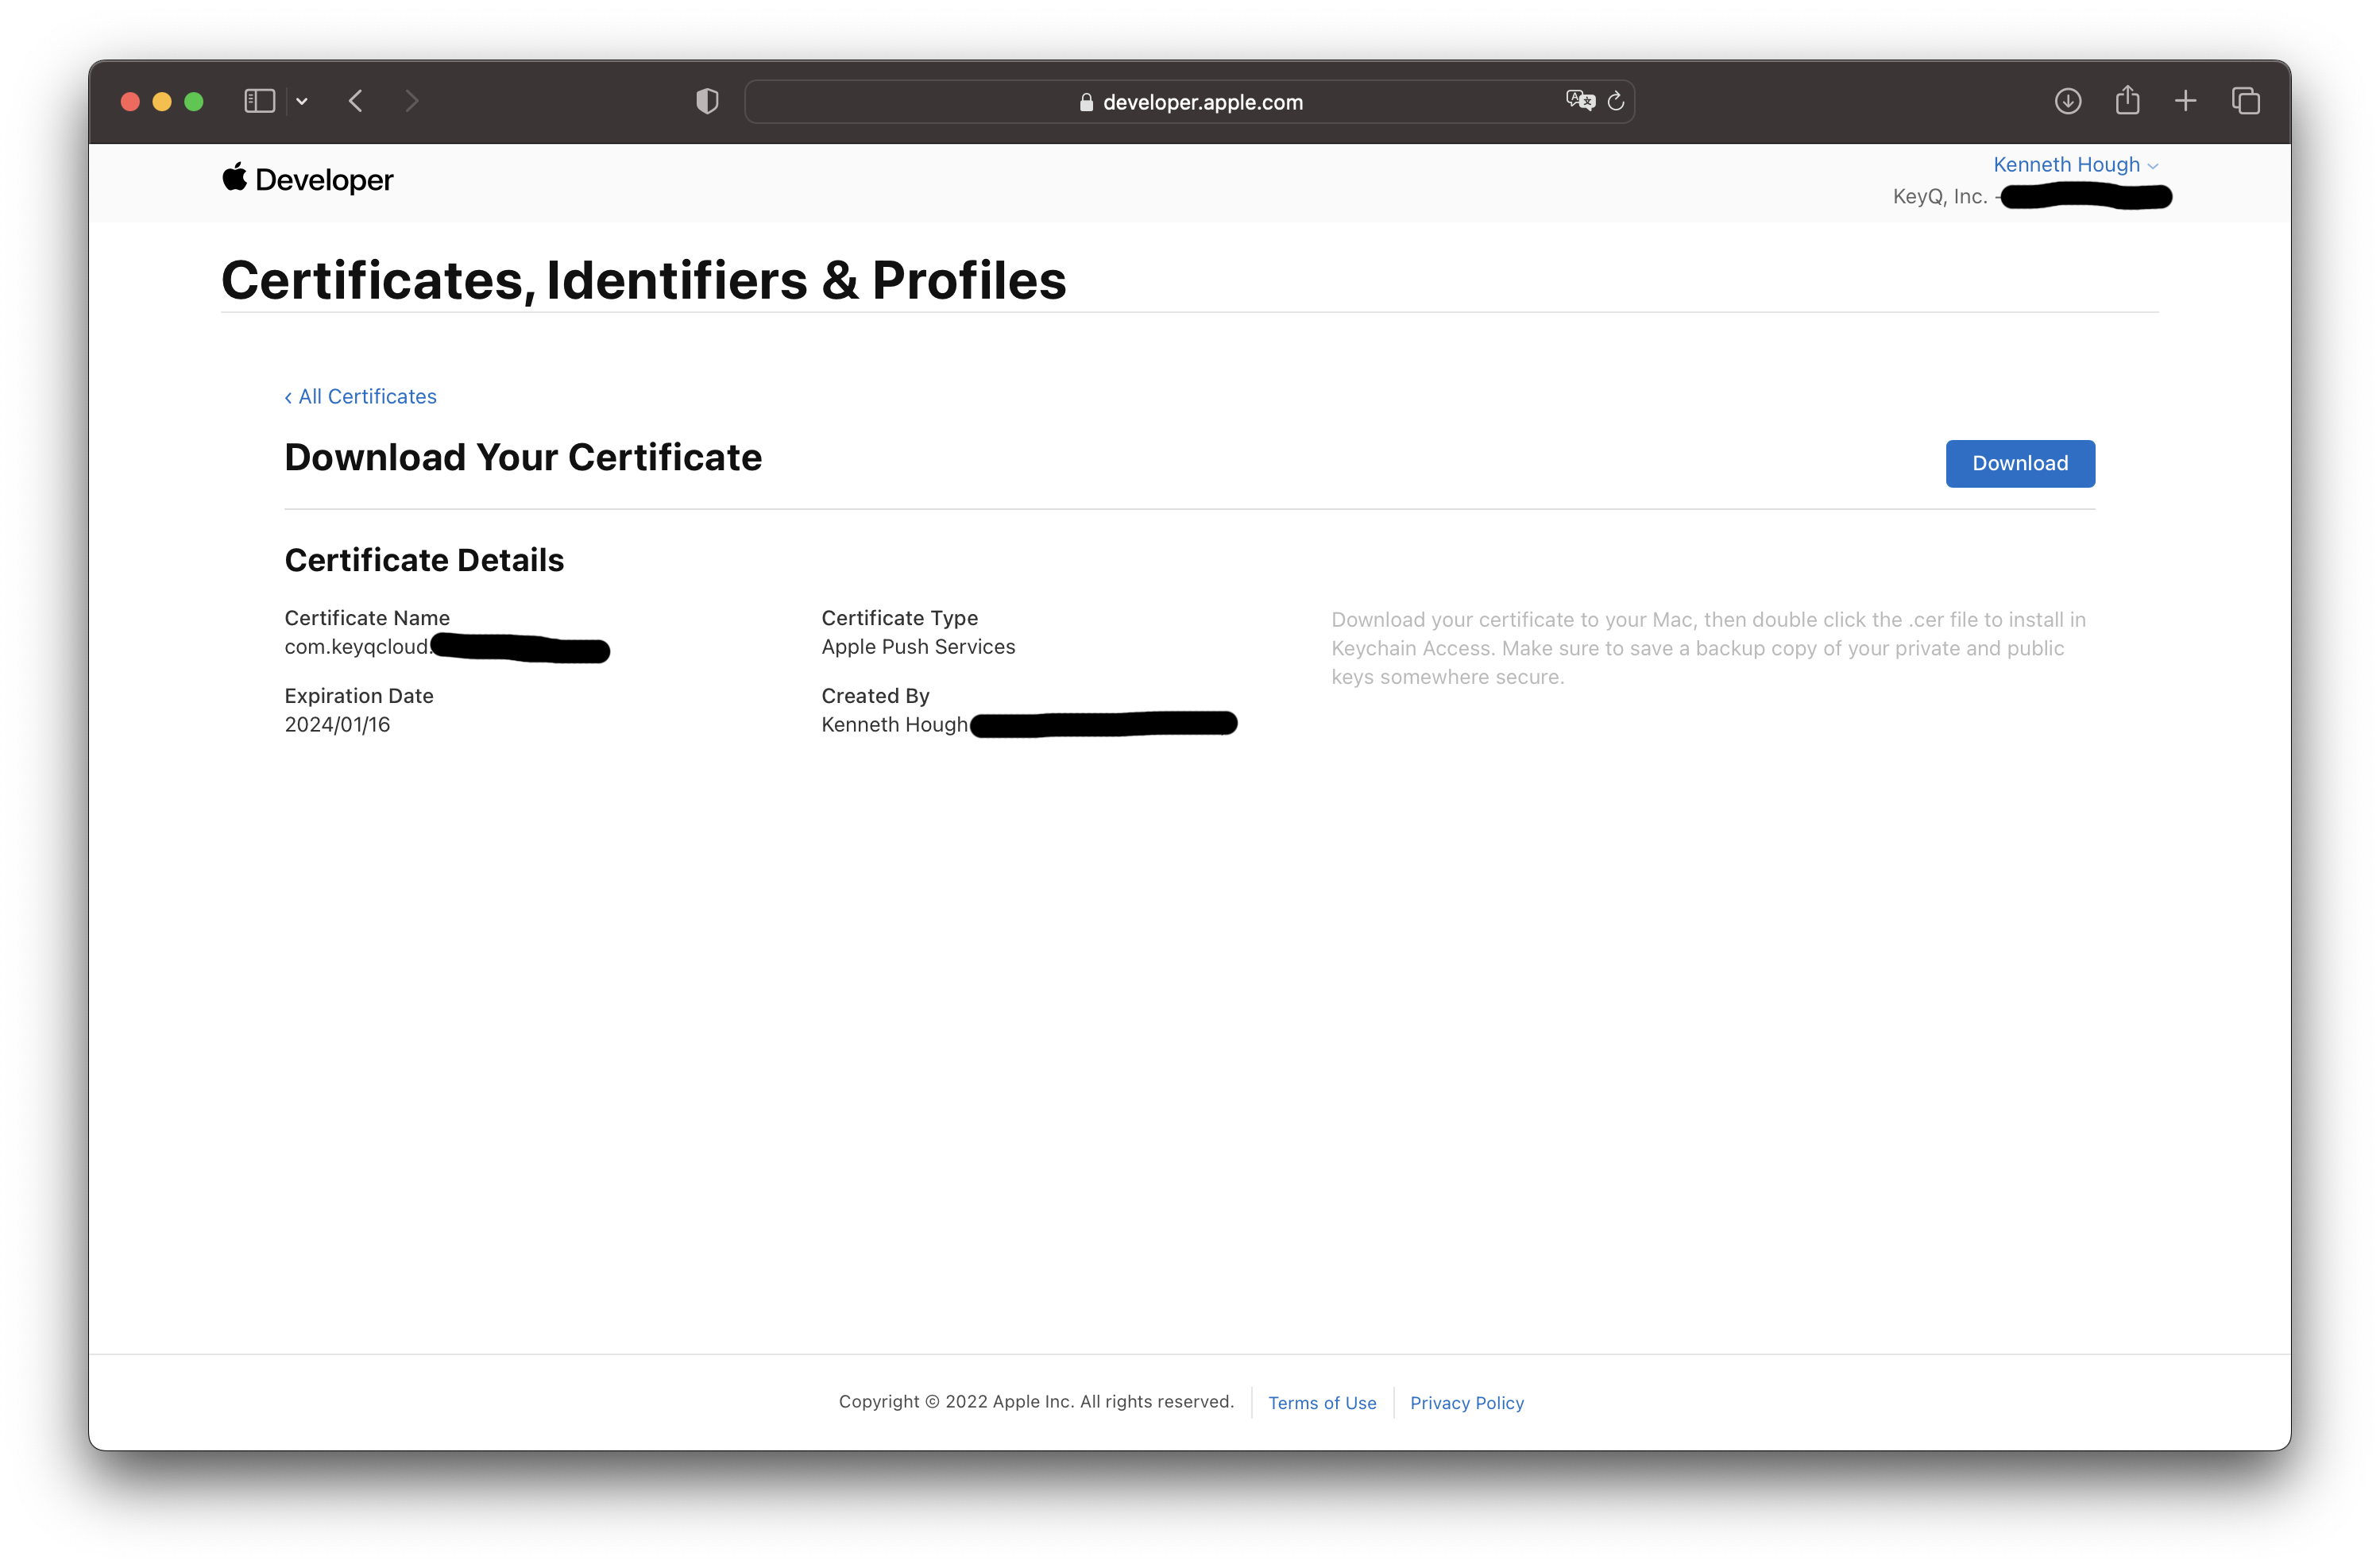
There you go! You now have a new APNs certificate that is valid for a year.
For some, this may be all you need. But if you're looking to export your certificate in the Personal Information Exchange p12 format, stick around to see how that's down. There's also an additional bonus on how to update your APNs certificate on your AWS SNS Push Notification platform.
Exporting your APNs Certificate in p12 Format
To export your new APNs certificate in p12 format, you'll need to open the certificate file in Keychain Access and export it with the private key associated with the certificate. To do this, download the certificate and open it in Keychain Access. Next, navigate to the "Keys" section of Keychain Access.
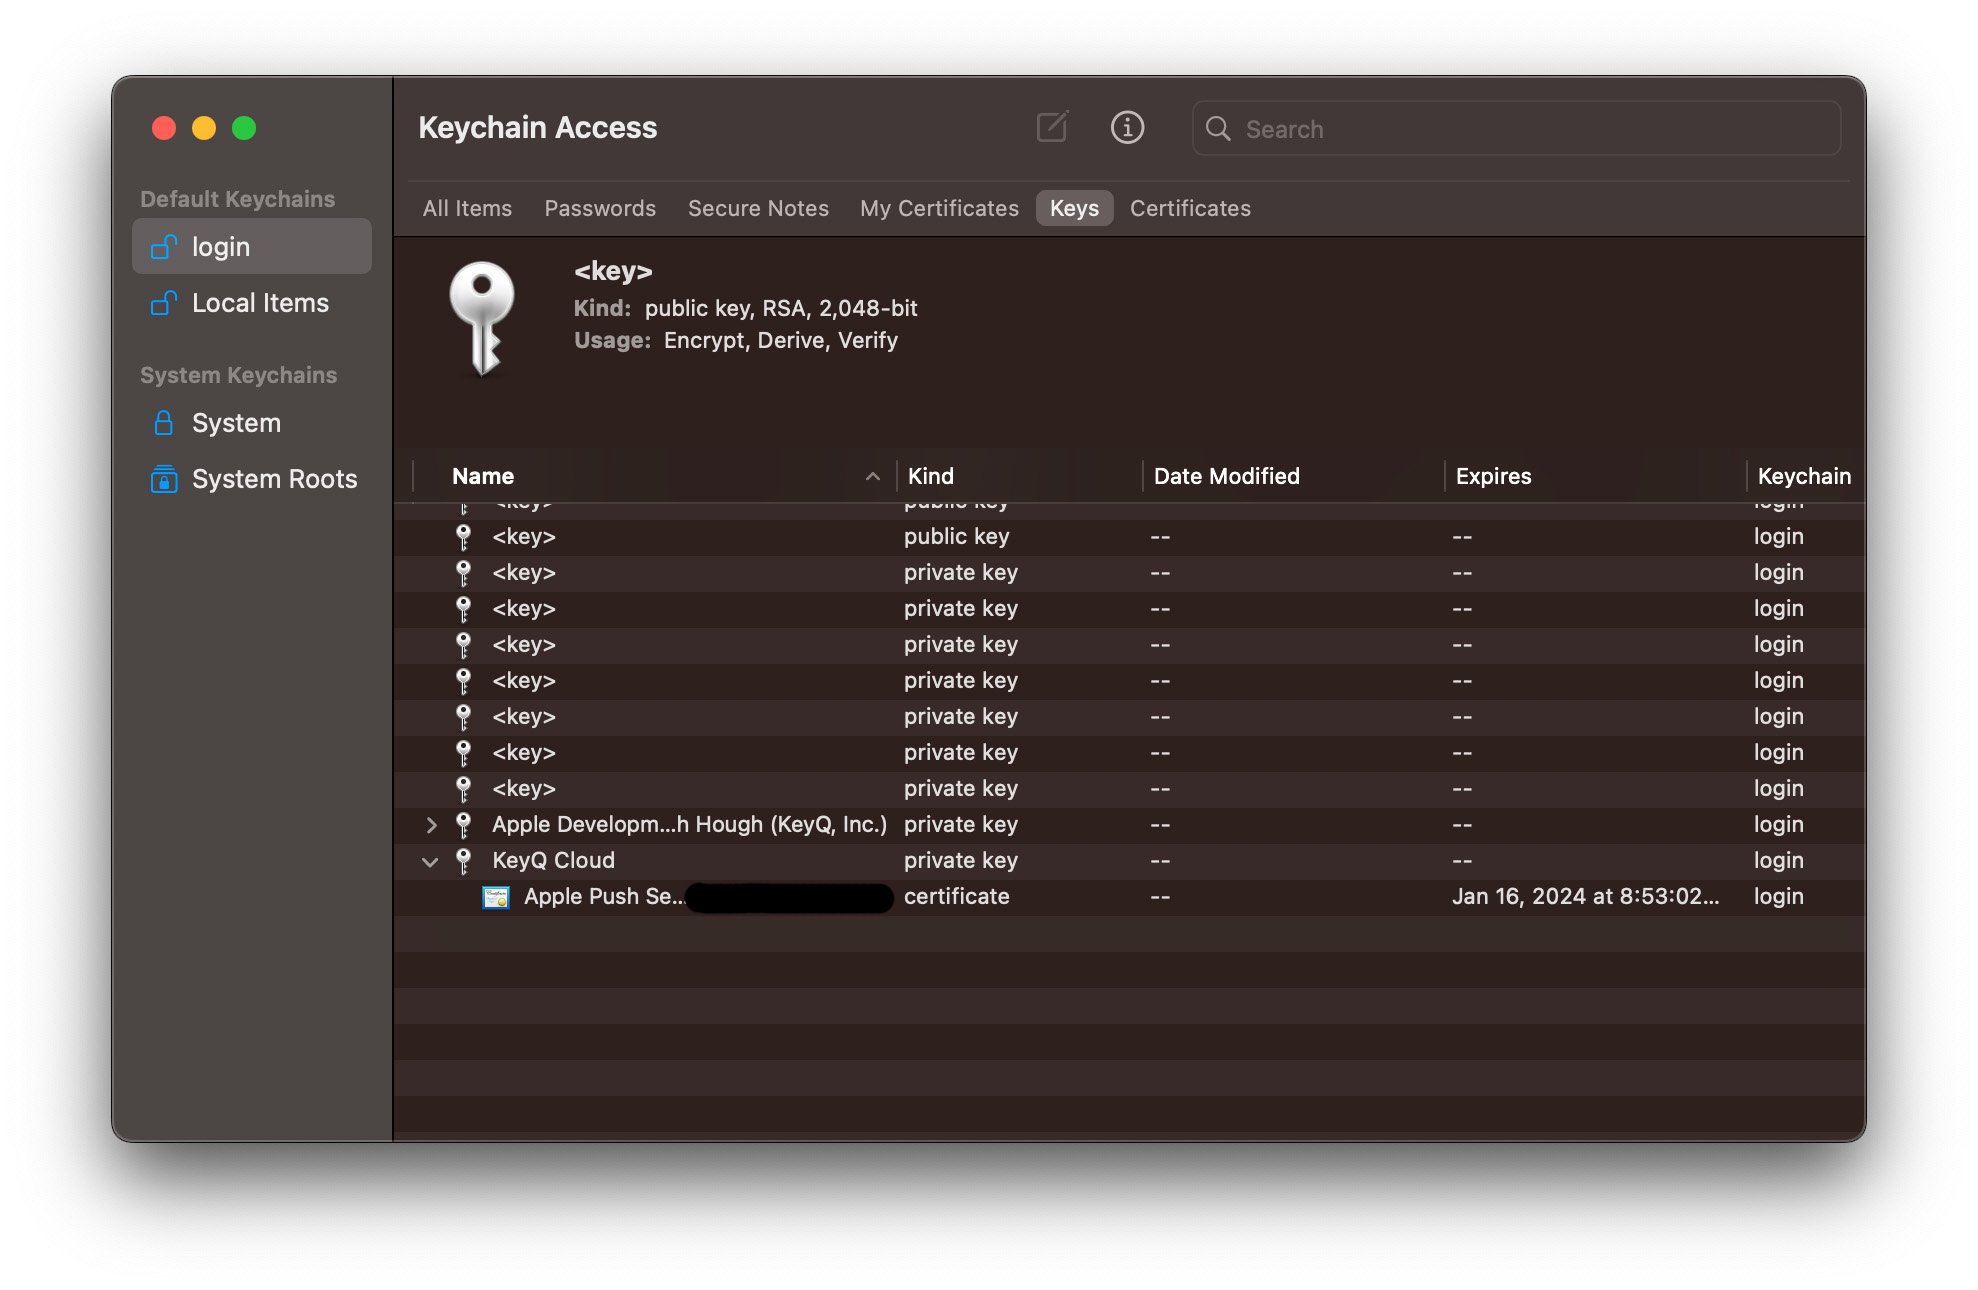
Select the private key with the same common name you specified in your CSR. Click on the arrow to expand the private key. You should see your APNs certificate with the correct expiration date that you just imported. Right click on the APNs certificate to show options, and select export.

In the save panel, make sure that Personal Information Exchange .p12 is selected. Give your certificate a name and save the file. You'll be asked to specify an optional password and save the certificate to disk. I recommend setting a password, but again, it is optional. Follow you organizations security best practices.
Updating the APNs Certificate on you AWS SNS Push Notification Platform
The final, and bonus step, is updating the APNs certificate on your AWS SNS Push Notification Platform. At the time of writing, mobile Push Notification is supported in the following regions:
- US East (N. Virginia)
- US West (N. California)
- US West (Oregon)
- Asia Pacific (Mumbai)
- Asia Pacific (Seoul)
- Asia Pacific (Singapore)
- Asia Pacific (Sydney)
- Asia Pacific (Tokyo)
- Europ (Frankfurt)
- Europe (Ireland)
- South America (São Paulo)
- AWS GovCloud (US-West)
Source: https://docs.aws.amazon.com/sns/latest/dg/sns-mobile-push-supported-regions.html
In this tutorial, I will be demonstrating in US East (N. Virginia) but make sure to select the appropriate and applicable region for your application.
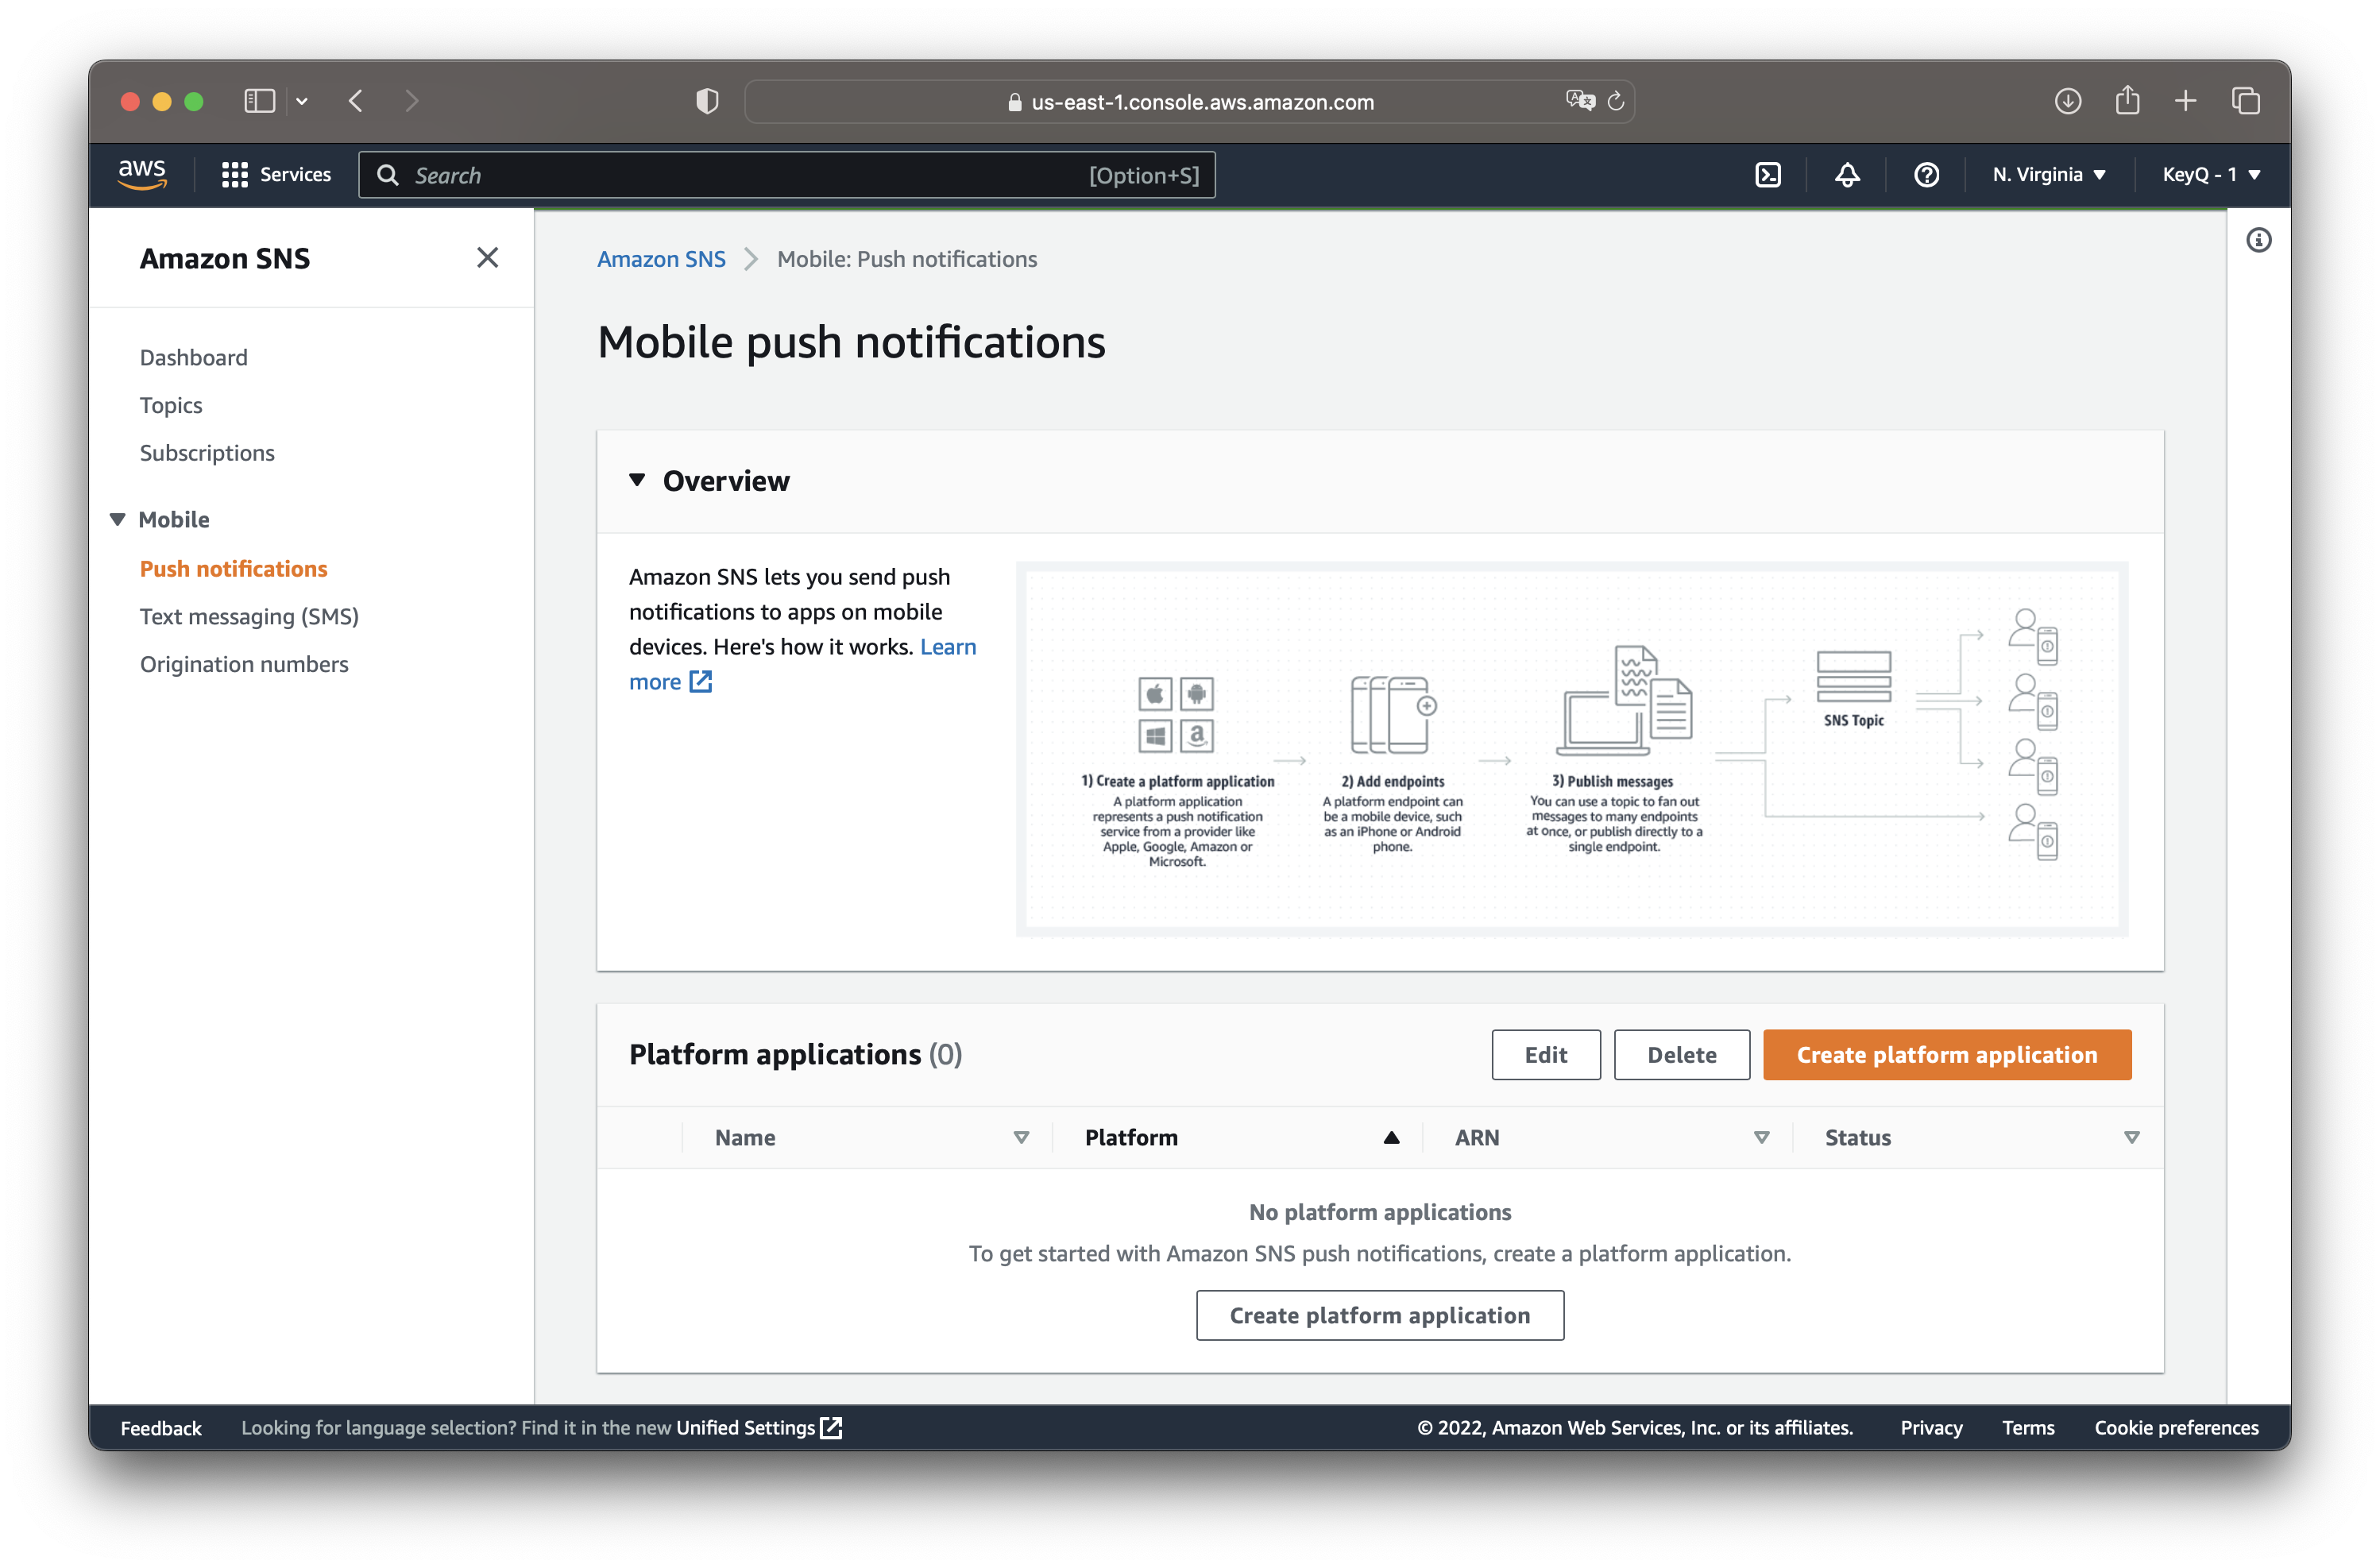
Navigate to AWS SNS and select Push Notification from the menu on the left. Next, select the Platform application from the list that requires a certificate update.
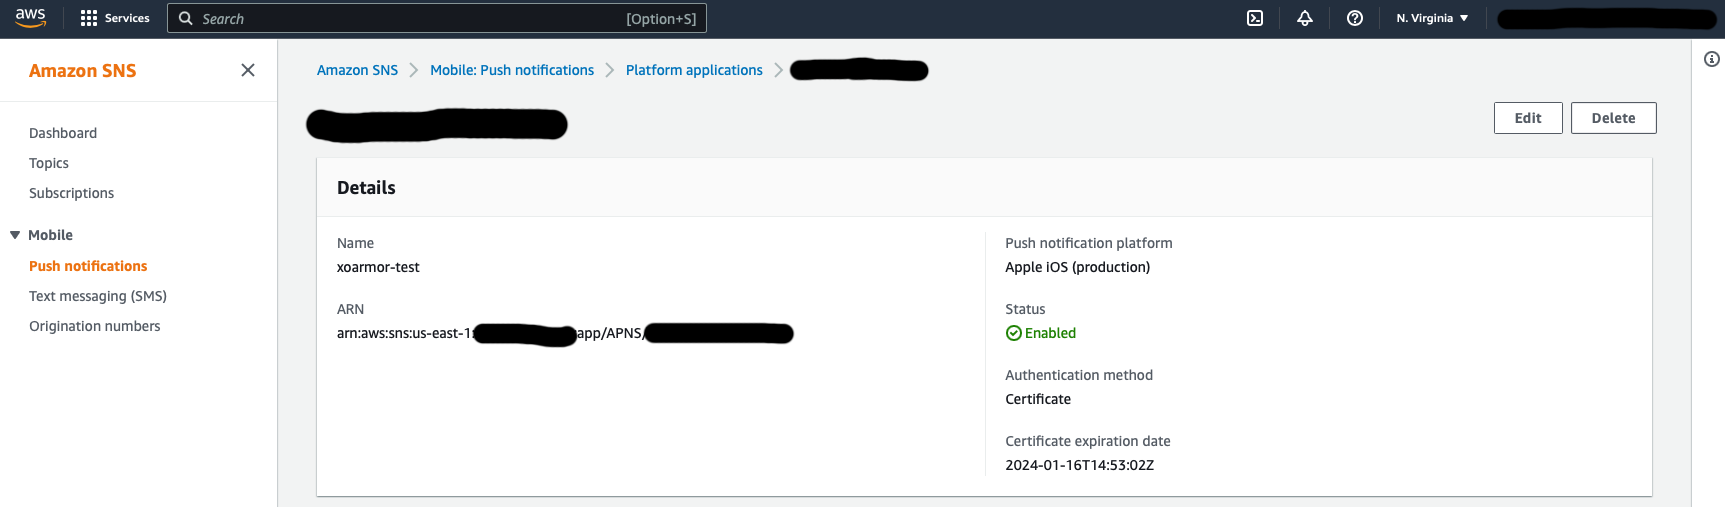
In the details page, select Edit.

You'll see under Details an Apple credentials section. Select "Certificate" as the authentication method, and click "Choose file" to upload the p12 certificate you just exported following the steps from earlier.
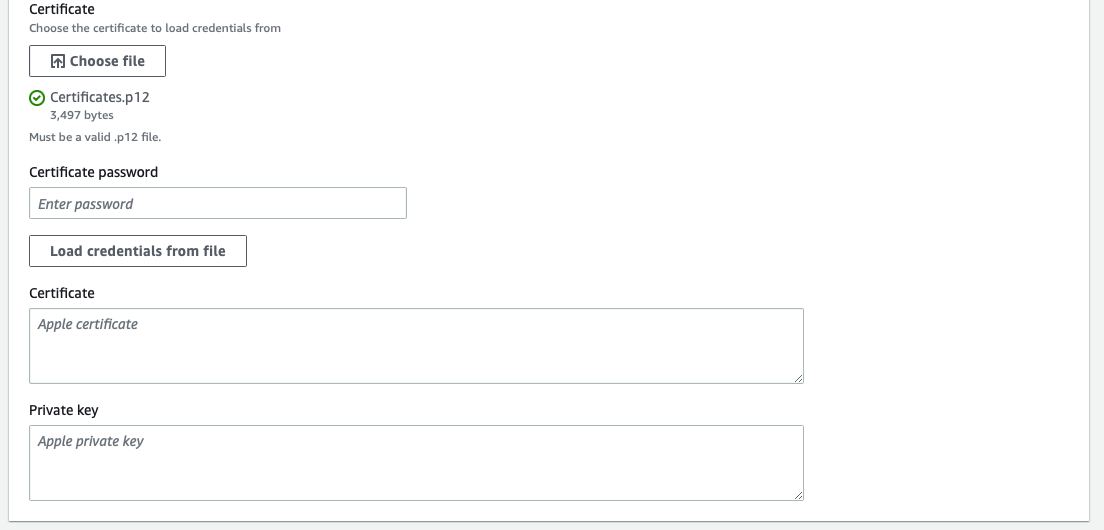
Once the certificate has successfully uploaded, you will see a green check mark next to the certificate file name. If you specified an optional password during export, supply it in the certificate password field and click "Load credentials from file". If you did not specify a password during export, you can leave the certificate password field blank and click on "Load credentials from file". You should see the Certificate and Private key fields populate with your APNs certificate data. Once the data is loaded, scroll to the bottom and click "Save changes".
Now you're all set to fire off Push Notifications from your AWS SNS platform!