
Maybe you’re a startup looking to create a new website for your company or an established small business trying to revamp your website. There are many options when it comes to website design and hosting, as well as content management systems (CMS) such as WordPress and Drupal, to name a few. In addition to the different technologies available, there are budgetary considerations to make that are associated with each option. WordPress, at the time of writing, offers $25 per month for managed hosting at the Business tier. You could also be ambitious and design a website from sratch and host it on AWS S3 for very little money.
Ultimately, the technology that you decide to use may be heavily influenced by your budgetary constraints. So, how do you create a professional looking website without spending an arm and a leg? Great question! You’ve come to the right place. The good news is, it is relatively easy to create a beautiful and responsive website that has the look and feel of a professionally designed WordPress website without having to spend lots of money.
If you’re looking to create a static website to help promote your business, then this tutorial may be of interest to you. However, this strategy will not work if you are looking to develop an interactive website, such as a blog. We will be writing more posts on cost-effective ways to host interactive websites in the near future (stay tuned!).
In this post, I will describe using Bootstrap, Bootstrap Studio, and AWS S3, AWS CloudFront (and optionally AWS ACM) to design and create a professional looking website for very little money.
Here’s the breakdown (pricing based on us-east-1 or US/Canada at the time of writing):
Bootstrap Studio
- $29 for standard, $60 for Lifetime license
- https://bootstrapstudio.io
AWS S3
- Standard storage is $0.023/GB per month
- Data transfer is free for first 1GB then $0.09/GB per month
- $0.0004 per 1,000 GET request per month
- https://aws.amazon.com/s3/pricing/?nc1=h_ls
- Free tier eligible!
AWS CloudFront
- Global CDN with free SSL certificate
- $0.085 per GB per month of data transfer to the internet
- $0.020 per GB per month of data transfer to origin
- $0.0075 per 10,000 HTTP requests per month
- https://aws.amazon.com/cloudfront/pricing/
- Free tier eligible!
Domain name (optional for tutorial)
- Anywhere from $8 to $50+ per year depending on your top level domain or TLD
So let’s summarize the cost a little more. You could spend $29 or $60 for Bootstrap studio, which is a one-time purchase to gain access to their desktop software to create responsive websites using the Bootstrap framework. The Lifetime license ($60) give you additional updates for the “lifetime” of their product.
Next, your domain. The price of a domain can depend on the type of TLD you get. For example, myawesomewebsite.life may be two times more expensive than myawesomewebsite.com. If you do not already have a domain, take your time and think about a good name that resonates with your business, as your domain will become part of your business’s identity.
Finally, hosting. Since Bootstrap Studio can export your website as static assets and HTML files, there’s no need to spin up a server, configure a LAMP stack and spend over $5/month on a virtual private server. Simply configure an AWS S3 bucket to serve your website and only pay for what you use, which will most likely be less than $1/month for a website with few pages and images. Just keep in mind that the more content you have and the more access you get to your site, your monthly cost will increase. But don’t forget the free tier! If you haven’t created an AWS account before, you can take advantage of free-tier services for the first 12-months (https://aws.amazon.com/free/), which includes the AWS services describes in this tutorial.
Lastly, do you need SSL for your custom domain? No problem! We can configure CloudFront to serve your static content via HTTPS with a free SSL certificate for your domain name!
Ok, enough introduction material, let’s get started!
Creating a Responsive Website
For this tutorial I am going to use one of the templates from Bootstrap Studio so be sure to replace it with the actual content you want to display when you are setting up your live website for your business.
Open up Bootstrap Studio and pick a template. Any template will do for this example as we will not be modifying the content. Definitely take the time to play around with Bootstrap Studio. It’s a great visual editor for Bootstrap enabled websites and has some great features for those who may not be code-savvy.
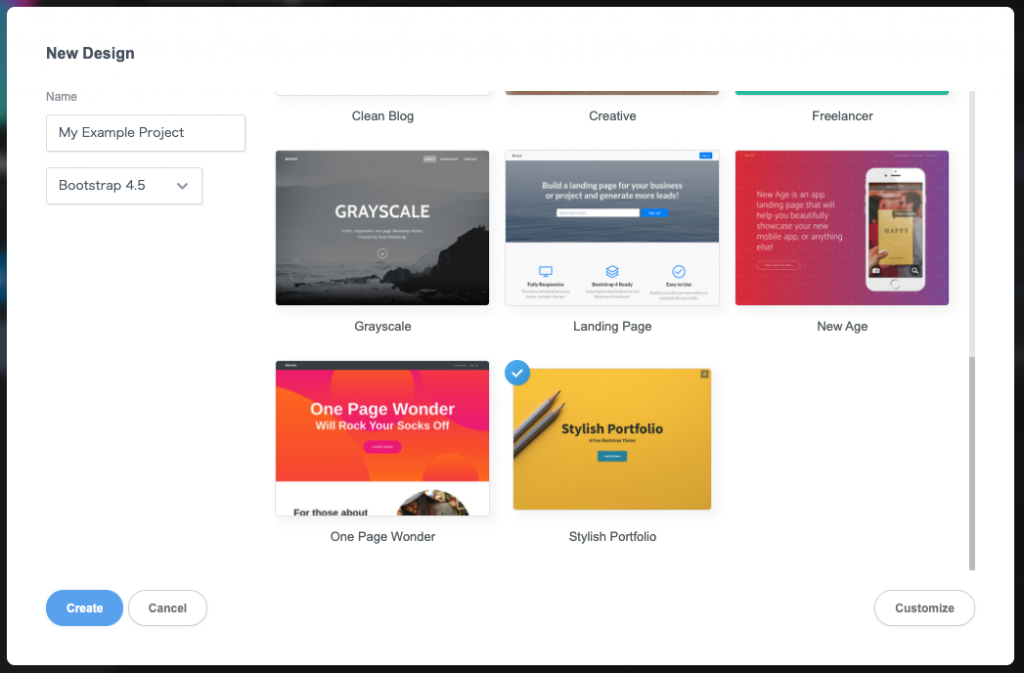
Tip: make sure to click that customization button on the bottom right and update the “Brand”.
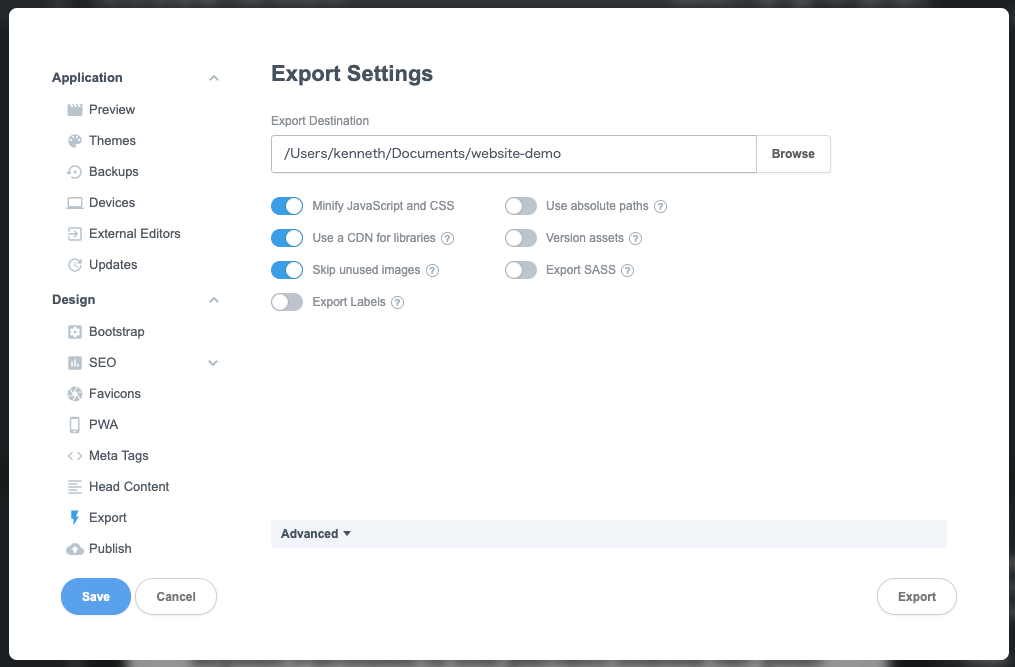
Once you’ve picked a template, let’s go ahead and export it so we can start configuring our website on AWS S3. Exporting your static assets and HTML files on Bootstrap Studio is very easy. Just go to “File” > “Export” and an Export dialog will appear. Pick your export destination, and select the optional settings below it. I like to check the following as it will help with my website performance:
- Minify JavaScript and CSS
- Use CDN for libraries
- Skip unused images
Once you’ve exported your website, we are ready to configure your AWS S3 to serve your new and beautiful static responsive website. If uploading the files to S3 manually is a hassle, you can use a GitHub repository and AWS CodePipeline to automate deploying your website (more on this in a separate blog).
Configure an AWS S3 Bucket
Now that you have your website files, it’s time to setup an AWS S3 bucket to host your website. If you haven’t already created an AWS account, get started by creating your free-tier eligible account (https://aws.amazon.com/free/). Remember, the first 12-months gives you access to free tier services, including the S3 bucket and CloudFront!
Once you’ve created your AWS account, hop on over to your AWS console (http://console.aws.amazon.com) and search for S3 under “Find Services”.
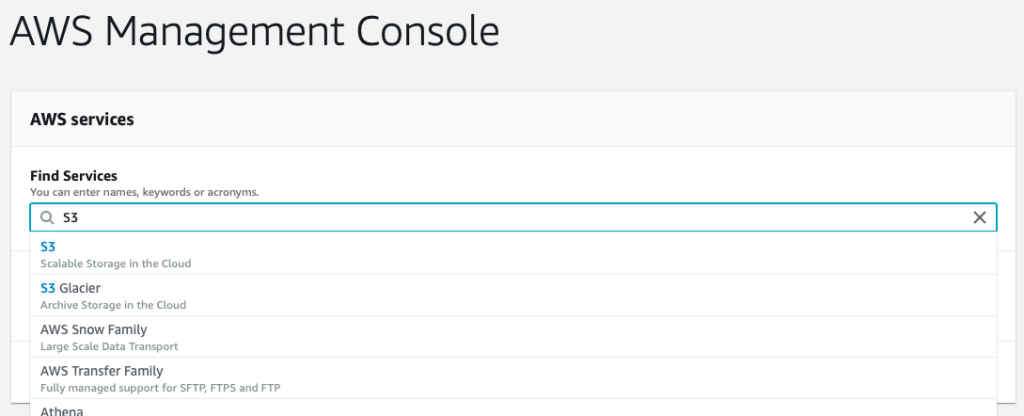 Hopefully you’ll see “S3 Scalable Storage in the Cloud” as one of the options. Click on S3 and navigate to the Amazon S3 console. To create a bucket, which is where you will store you website files, click on the “+ Create bucket” button.

A dialog should appear asking for a bucket name. I recommend using the fully qualified domain name. For example, if your domain name is myawesome-example-website.com, then use www.myawesome-example-website.com as the bucket name (see documentation https://docs.aws.amazon.com/AmazonS3/latest/dev/VirtualHosting.html). This is also where you can pick the region for your bucket. I recommend picking a region where your largest customer base exists but we’ll be configuring a content delivery network (CDN) later on in this tutorial to increase website availability and performance, so don’t worry if you’re not sure.
Once you’ve picked a bucket name and region, click create to finish the setup. You should return to the Amazon S3 console where you will see the bucket you just created. Click on the bucket name to start configuring it for static web hosting.
The first step is to upload your website files to your bucket. You can easily upload files by dragging and dropping your website files and folders to your S3 bucket, or by clicking the “Upload” button. Manually uploading your website files every time you update a content can be a hassle. We can automate this process with GitHub and AWS CodePipeline to update your website each time you push new files to your GitHub repository (more on this in a separate blog).
Once your files are uploaded, we need to configure the correct permissions for your website. You first want to hop on over to Permissions and disable “Block public access.”

Now that we have disabled “Block public access,” we need to add a policy to allow anyone on the web to be able to view your website files. To configure your bucket policy to allow public access for anyone on the web, use the example JSON bucket policy below, but make sure to change the bucket name to the one you picked.
{
    "Version": "2012-10-17",
    "Statement": [
        {
            "Sid": "PublicReadForGetBucketObjects",
            "Effect": "Allow",
            "Principal": "*",
            "Action": "s3:GetObject",
            "Resource": "arn:aws:s3:::www.myaweseome-example-website.com/*"
        }
    ]
}
Place the above bucket policy in the text editor of the Bucket Policy permissions section.

Once bucket policies are set, we need to enable static web hosting for our bucket. Navigate to the properties tab and click “Static web hosting” to enable it and specify “index.html” as your index document. You can optionally specify an error page as well (which I recommend doing).

Voilà, and your website is ready! Navigate to the endpoint URL you saw when configuring your static web hosting to check that your website is visible to the public. The URL will take the following format:
http://<bucket name>.s3-website-<region>.amazonaws.com
In our example, the endpoint URL is:
http://www.myawesome-example-website.com.s3-website-us-east-1.amazonaws.com
You may have noticed that the website does not use HTTPS. Although you can change HTTP to HTTPS and use Amazon’s S3 certificate, you cannot use a custom domain with SSL directly from a S3 origin.
Read on to learn how to configure a content delivery network (CDN) and associate it with a custom domain and SSL.
Configuring AWS CloudFront as a Global CDN
A content delivery network (CDN) is a network of geographically distributed proxy servers that help enhance performance and availability. There are many CDN services available, but we will be configuring AWS’s CDN service called CloudFront. From the AWS console dashboard, navigate to CloudFront.

From the CloudFront console we will be creating a new distribution. Click on “Create distribution” then select “Get Started” under Web.

You’ll be directed to a page called “Create Distribution” which has many fields and options, but fret not – it’s really simple. To start, type the FQDN domain name of your S3 bucket under Origin Domain Name. When you start typing, you’ll notice a drop down list with the bucket you just created – but don’t be fooled! Since we are trying to create a distribution for a static web host, we have to use a different domain name. Remember the URL from earlier?
<bucket name>.s3-website-<region>.amazonaws.com
Using the bucket name and region (us-east-1) from our example, the Origin Domain Name will be:
myawesome-example-website.com.s3-website-us-east-1.amazonaws.com

Next select the following options:
- Viewer Protocol Policy – Redirect HTTP to HTTPS
- Compress Objects Automatically – Yes
We can also configure the CNAME and SSL certificate at this stage, but we will leave that for the next section so that we can walk through the process of creating a distribution using the default CloudFront certificate and automatically assigned domain name. Once the options have been set, click “Create Distribution” and hopefully you are redirected back to the CloudFront console without any errors.

After creation it may take a few minutes for the distribution to complete deployment. You can check on the status periodically to see if the state is “Enabled”. Once enabled, you can navigate to your new distribution using the Domain Name that is assigned. In the above example, I have edited out the ID and Domain Name to fake values (SOMEID and ABCDZYZ.cloudfront.net, respectively). Open a new browser and navigate to the domain name to view your new CDN distributed website!
Cool right?! Ok, now let’s configure an SSL certificate for your custom domain using Amazon’s Certificate Manager.
Getting an SSL Certificate for your CloudFront Distribution
To get an SSL certificate for your custom domain, you’ll first need a domain name. If you haven’t purchased a domain name yet, then come back to this step later.
The first step to obtaining an SSL certificate for your custom domain is provisioning a new certificate through Amazon Certificate Manager (ACM). From the AWS console, navigate to ACM. Next, make sure that the region on the top right is set to “N. Virginia (us-east-1)”, and if not change it to “us-east-1”. ACM certificates requested in the “us-east-1” region are made available to global CloudFront distributions (https://docs.aws.amazon.com/acm/latest/userguide/acm-regions.html).

If this is your first certificate, click on “Get Started.” Otherwise, click on “Request a certificate.” In either case you will be directed to a page asking if you want a public or private certificate. Select “Request a public certificate” and click “Request a certificate.”

Next, add your domain names. You can add each domain name you wish to protect with an SSL (like in the example below) or also use the wildcard (*), for example *.myawesome-example-website.com.

Next, for validation method, I highly recommend DNS validation as it is faster and more reliable.

Click, next, then the “Review” button unless you wish to add tags to your certificate request. You will be asked to review your request one last time. Double check that all values look correct and then click “Confirm and request.”

Once confirmed, you will be presented with the CNAME records that need to be added to your domain to complete the validation. Validation can take anywhere from a few minutes to 24 hours.

After successful validation, you will see the status of your certificate change from “Pending validation” to “Issued” in green. Once issued, navigate back to CloudFront and click on the distribution you created in the last section. Under the “General” tab click on “Edit.”

Add the domain names that you have issued certificates for under Alternate Domain Names (CNAMEs) and select the Custom SSL Certificate option. In the text box below, a dropdown list should appear with the SSL certificate that you just requested and was issued from the previous steps.

Save the changes you’ve made and let the distribution reconfigure (may take a few minutes). Once complete, you now have a SSL certificate for your custom domain name for your website! Don’t forget to add the CloudFront issued domain name to your domain as a CNAME record so that people can successfully navigate to your website using your custom domain name.
Summary
Configuring AWS to host your Bootstrap enabled responsive static website is relatively straight forward. This can be a great cost-saving strategy for businesses and freelancers wanting to host a static websites to help promote their business.
This tutorial covered the basics for creating a new S3 bucket for your static responsive website, configuring a content delivery network (CDN) and an additional SSL certificate for your custom domain name. However, there are definite limitations to this implementation, including the inability to create custom forms. These limitations can be worked around using 3rd party solutions, such as Google Forms or SendGrid’s embedded contact form.
I hope this tutorial has been helpful in getting you started with your website project, and hopefully you’ll keep us in mind when you are ready to expand your tech to the cloud.